
Home Addition: Chestnut Street.
Completed March 2016.
Regional Winner CotY 2017 - Residential Addition
AFTER PHOTOS


Nestled among majestic trees in Ann Arbor Hills, this ranch will get a serious uplift in the form of a major 2nd story addition. Please visit our current work blog to see the transformation.
JULY 7, 2015
We are beginning a new project at this beautiful home.
The plan calls for a second story addition and new front entry.
This is the current walkway to the front entry.
The Beech tree on the left is a landmark tree. Some trimming has occurred and barriers will be placed around it to protect its roots.
JULY 9, 2015
First floor plan
Detailed plans show spatial relationships between rooms, and describe the construction methods and materials intended for the project.
Second floor plan
Elevation front
This drawing shows the addition from the front, and describes what materials will be used.
At driveway sketchup view
We use a combination of line drawings and 3D modeling programs
to describe the project to our clients and construction crews.
Stairs 3D view from above
A main feature of this project will be the stairs, which will wrap around the breakfast nook and float to the second floor. It will be surrounded by glass railings with wood caps.
JULY 14, 2015
Any important plant was removed before our work began.
The stone pavers at the walkway were also removed and stacked to the side.
They will be reused at the new walk location.
Sheets of plywood will go down on the grass to help keep it from getting too many ruts.
The black fabric at the left of the picture is silt fence.
It is dug into the ground, and keeps the disturbed soil from washing away.
Demolition has started at the front entry.
Some of the removed brick has been saved and will be reused
where we tie in the new and the existing buildings.
Our foundation crew mobilizes their equipment.
They are ready to dig for the new foundations.
JULY 16, 2015
Excavation has taken place and the forms are set for the new footings.
Reinforcing bars are run inside the concrete footings.
Our carpenter has determined the exact position of the new walls
for the critical layout of the new construction.
Our foundation contractor, CLM, pours the concrete footings
after the city inspects and approves the dig.
This cool little truck brings the concrete from the cement mixer at the street, right to where it’s needed.
JULY 23, 2015
Block foundation walls are being set.
The concrete block steps back to create a brick ledge for the new masonry cladding.
Inside, beams are replaced in preparation for the new structure.
This header will carry a new second floor, walls and roof framing.
The temporary wall covered with plastic helps with dust protection.
JULY 28, 2015
The block foundation walls are finished.
The rods sticking out of the walls will connect the new wood framing to the block.
A thin layer of concrete is poured in the crawl space area.
AUGUST 10, 2015
Temporary walls were built with locking doors to keep the house secure
while we demolish and rebuild exterior walls.
Still tearing out walls...
A bathroom was removed here but will be put back in the same location,
with only a few minor changes :-)
AUGUST 14, 2015
The remodeling work on this project is in full swing.
By removing layers, we can see how a building “grew” over the years.
The roof is being peeled back carefully, to expose the heating and cooling ductwork and the electrical.
At the end of the day, we do our best to cover up the project and keep Mother Nature out.
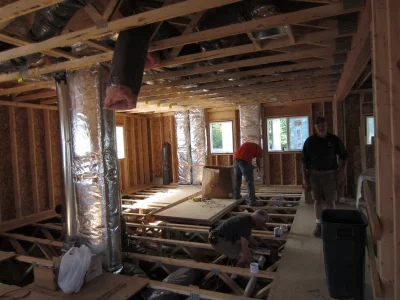
AUGUST 20, 2015
The last of walls that need to come out, are being demolished.
Floor framing is going down. If you noticed, one of the joists is an orangey color.
This is a structural member, and will carry heavy loads from framing above.
Meanwhile, up on the roof, the mechanical and electrical have been removed enough to allow the framing to continue. And only a few surprises. Life is Good.
AUGUST 27, 2015
New framing is being laid next to the existing roof trusses.
These floor trusses allow us to run heating and cooling in the same space as before
to the other end of the house.
Starting to put things back.
These skylights are going to change.
A view if you were a squirrel.
AUGUST 31, 2015
A steel beam allows us to meet our design goals of an open entry,
and carry the weight from the new second floor loads.
The top chords of the old roof trusses are cut off
after the bottom chords are attached to the new floor trusses.
Necessity is the mother of invention.
Floor trusses are all in, and the plywood sub-floor is almost done.
The size of the addition space is starting to come to life.
SEPTEMBER 4, 2015
The first walls are going up on the second floor.
The framing crew makes quick work of the second floor framing.
In no time, they are finished up here. The Tyvek housewrap is a one-way vapor barrier.
It allows moisture to escape from the inside.
This view shows the second floor space before the interior walls are framed.
Extensive electrical and mechanical work will come next.
…and the blue tarp goes back on for the night.
SEPTEMBER 11, 2015
The front entry walls are added.
Plywood roof sheathing is lifted to the top, and the crew gets us ready for shingles.
He looks like he enjoys his work.
It’s all about the water.
This shingle underlayment is meant to keep the house dry.
This is our first glimpse of the entry from the inside.
The space on the right is where the stairs will be.
September 18, 2015
Windows are installed.
HVAC, plumbing and electrical are being installed, inside.
Brian, our lead carpenter has a lot to manager.
The mason puts up scaffolding in preparation for the stone work.
September 25, 2015
An old flat roof is being removed and prepared for new.
The old skylights are also removed, and new wells are built.
Advancements in window technology allow a shallower well without the leaks.
The new skylights go in, and the roof is water tight.
All in a day’s work.
October 1, 2015
Stone work has begun.
Masonry ties hold the stone to the wall.
We are using a stacked pattern, for a more contemporary look.
October 8, 2015
Lap cedar siding is being installed on the walls of the second floor addition.
A mitre joint at the corner of the siding matches the original style of the home.
Second floor interior walls are in, and the rooms are taking shape.
October 14, 2015
Custom sill stones are ordered for the window openings.
They are made to our specifications for this project.
Our mason matched the bevel of the sill stones we ordered,
and notched the stone at the window corner in the field, for a perfect fit.
Brian is helping to work out the details where the stone meets the roof.
A beautiful view of the new stone tower.
October 22, 2015
A view of the second story addition from the back yard…
…and the side yard... The plant material in the foreground is part of a new rain-garden.
Water from the roof is collected here and helps minimize soil erosion and pollution of our local water resources. The City of Ann Arbor gives program participants a storm-water rate credit.
The view from the second floor:
this two story front entry is the perfect place for a beautiful chandelier.
Rough plumbing, rough electrical, and HVAC have been completed.
We are ready for insulation.
October 28, 2015
Cellulose insulation goes in the exterior walls.
One man sprays, and the other vacuums.
Scaffolding gets the insulation installers to the top of the cathedral ceiling.
This is the new front entry, with the insulation all cleaned up. The closet walls will get
custom finished with special materials, fabricated by our cabinet maker.
These temporary stairs will be replaced with a new floating staircase. We are waiting as long as we can to install the new stairs, so they are protected from being damaged.
November 4, 2015
The carpenters have begun framing the front entry porch.
Custom brackets and decorative hardware are exposed connections at the structural pieces.
The natural cedar timbers will greet and protect guests at the new entry.
A crushed limestone base is built up to connect the driveway to the porch.
Brick pavers salvaged from the original walk will be reset.
November 20, 2015
This is a view to the entry addition form the second floor balcony.
We have used blown-in cellulose insulation, and we are ready for drywall.
At drywall, we consider the project to be approximately half way from completion.
Scaffolding gets the drywall and plaster contractor up to the tall ceiling spaces.
A view of the entry from the inside.
Our temporary stairs have been replaced with a ladder.
Check out these temporary railing fasteners.
They provide a strong railing, while still allowing new work to proceed.
Safety is always a top priority on every jobsite.
December 2, 2015
The new front entry… waiting for the door…
This will be the new shower. Next to install… tiles!
December 11, 2015
Finished floors are being installed.
Here, the transition between the existing hardwood and the new tile floors is set.
Before: A radiator was eliminated and holes in the floor need to be repaired.
...That’s a lot of tools for a small job.
After: Our hardwood floor contractor will make it virtually disappear.
A transition board buffers between the existing floor and the new.
This eliminates the necessity of refinishing the entire first floor hardwood.
Once the new maple floor is finished, it will blend beautifully with the old.
This area will be the breakfast nook. The stairs to the second floor will wrap around the right side and at the window.
December 18, 2015
Tile work has begun in the front entry.
The little circles are inserted during laying, to provide consistent spacing.
They are removed when it is grouted.
The shower pan is created, and tested per code, to make sure it holds water without leaks.
The floor is a hexagon-shaped ceramic tile.
The vanity cabinet is set, and wall tile fills in around the room.
December 23, 2015
Zach, what are you doing up there? Don’t give the kids any ideas.
He is on top of the new entry closet.
Jay, one of our lead carpenters, is wrapping his head around the install
of a special finish material at the entry closet walls.
Just a few shims…and the door jamb will be perfect!
December 28, 2015
The before photo...
The after photo.
...The doors are around here, somewhere.
Notice how the grain continues through the seam.
This, the other side of the closet, is an amazing backdrop to the new stairs.
This is the view from the second floor balcony.
January 5, 2016
Happy New Year!!
The intermediate landing for the stairs is set,
and the stringers are checked for accuracy.
These are the walnut stair treads.
They are being custom fabricated by our favorite cabinet maker and artisan.
The CNC machine seen here (Computer Numerical Control-a computer that controls tools with precision) is used to mortise the stringer to receive the tenon on the tread.
Soon, they will be ready for installation.
February 2, 2016
The Rochman Design Build carpenters are getting themselves ready for the install of the stairs.
It’s heavy, and will require all this manpower.
Some ropes and leverage will help, too.
The stairs are in, and quickly treads and floors are protected with a cardboard cover.
February 9, 2016
Final touches are happening everywhere. Secret doors connect two spaces from inside the closets. There are fun spaces for everyone at this remodel.
Cabinet hardware for doors and drawers are ready to be installed. There will be a framed mirror over the vanity and a glass door at the shower, then this space will be finished.
The front door and chandelier at the entry are in and the floor protection has been removed. It’s starting to feel more like a home again, and less like a construction site.
March 1, 2016
The glass guard rail is being installed.
Detailed Plexiglas templates were made and the tempered glass was special ordered.
The walnut rail caps the glass.
March 15, 2016
The shower door is installed.
The bathroom has walnut cabinets with a matching mirror frame, window and door trim and tile cap.
The bathroom is finished and the clients are enjoying their new space.
The stair railings are finally finished, and they look beautiful.
March 22, 2016
Final update... and some additional after photos
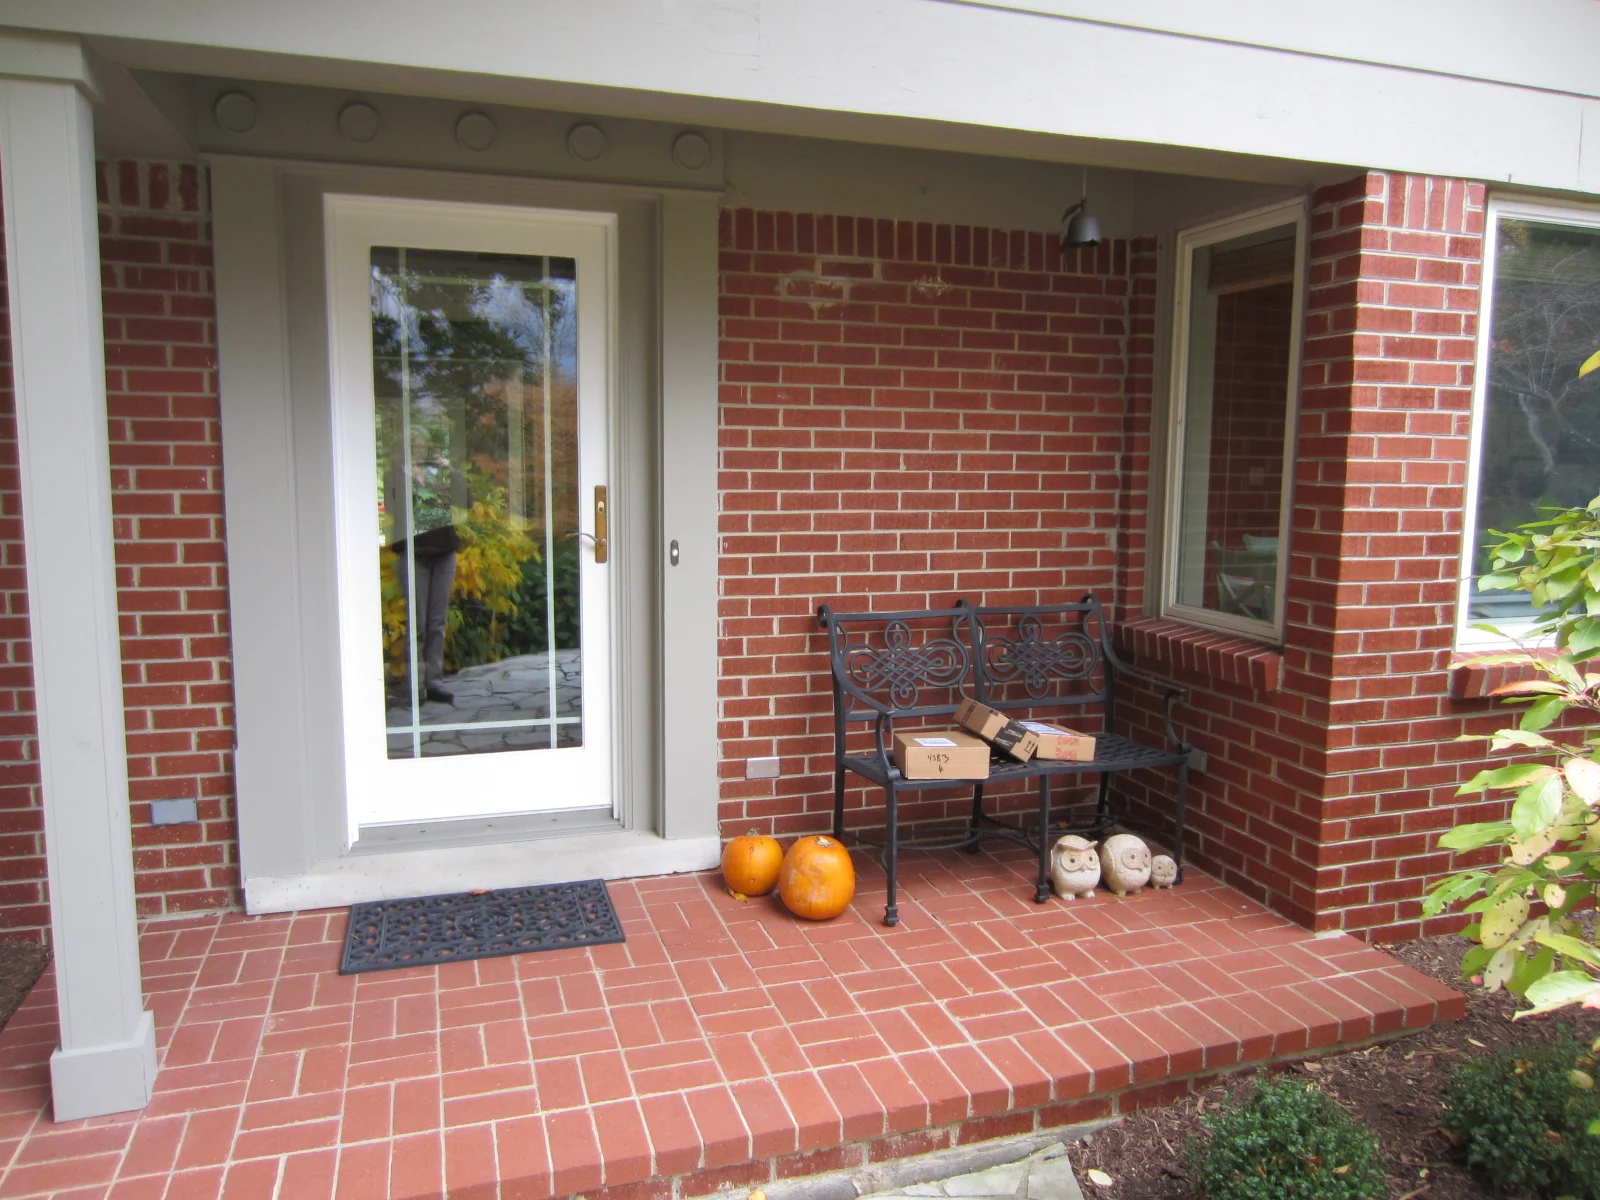

The old front entry on the left, has been replaced by the new front entry on the right;
beautiful and inviting.
The breakfast nook and the wrap around staircase leading up to the new 2nd floor addition.


Details of the gorgeous staircase.
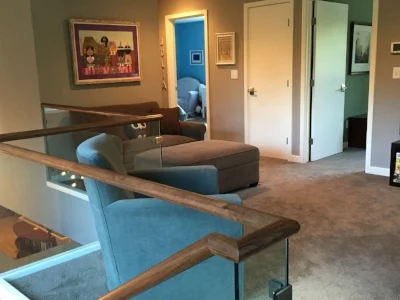
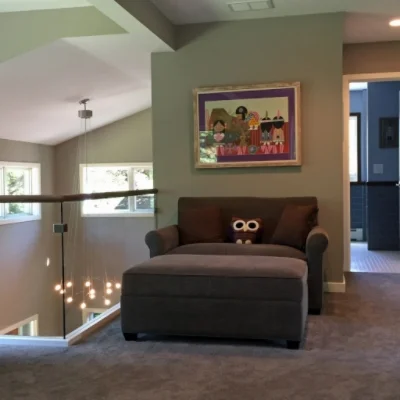
The upstairs den / family room area
The guest room.

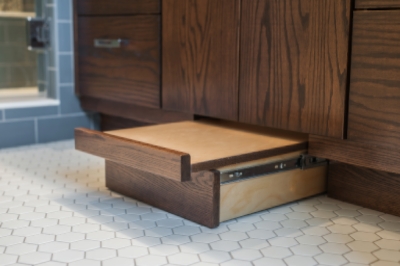
The bathroom with the built-in step stool :-)
But BEST of all, and most important... our happy clients!
Thank you for giving us the opportunity to work with you.


