
1st Flr Open Concept Remodel: Old West Side
The Vision:
This 1918 Sears "Vallonia" kit house sits in the heart of Ann Arbor’s historic district, carrying a legacy of craftsmanship that we are honored to preserve through this transformation. Currently, the first floor maintains its original, compartmentalized layout—featuring a stark black-and-white blocked floor and a vibrant pink bathroom—that no longer aligns with the homeowners' lifestyle. Our goal is to reimagine this interior footprint by opening up the space to create a sophisticated environment tailored for game-day entertainment, all while respecting the home's architectural soul. To ensure the exterior remains as faithful to its history as the interior is to its new purpose, we are also replacing the upstairs windows with new units that meticulously reflect the home's original historical style.
Key Elements:
· Open Concept Conversion: Removing interior partitions to transition from a compartmentalized floor plan to
an expansive entertainment layout.
· Gameday Entertainment Hub: Integrating modern amenities and tech-ready surfaces designed for hosting.
· Interior Finish Overhaul: Updating the original aesthetic—including the black-and-white flooring and pink
bathroom—with high-end, contemporary finishes that complement the historic district setting.
· Historical Window Restoration: Replacing second-story windows with architecturally accurate styles
consistent with the 1918 Sears "Vallonia" design.
We invite you to follow along with our Current Work Updates as we cross each major construction milestone on the way to a gorgeous finish
Pre-Demolition Phase - The Vision at a Glance
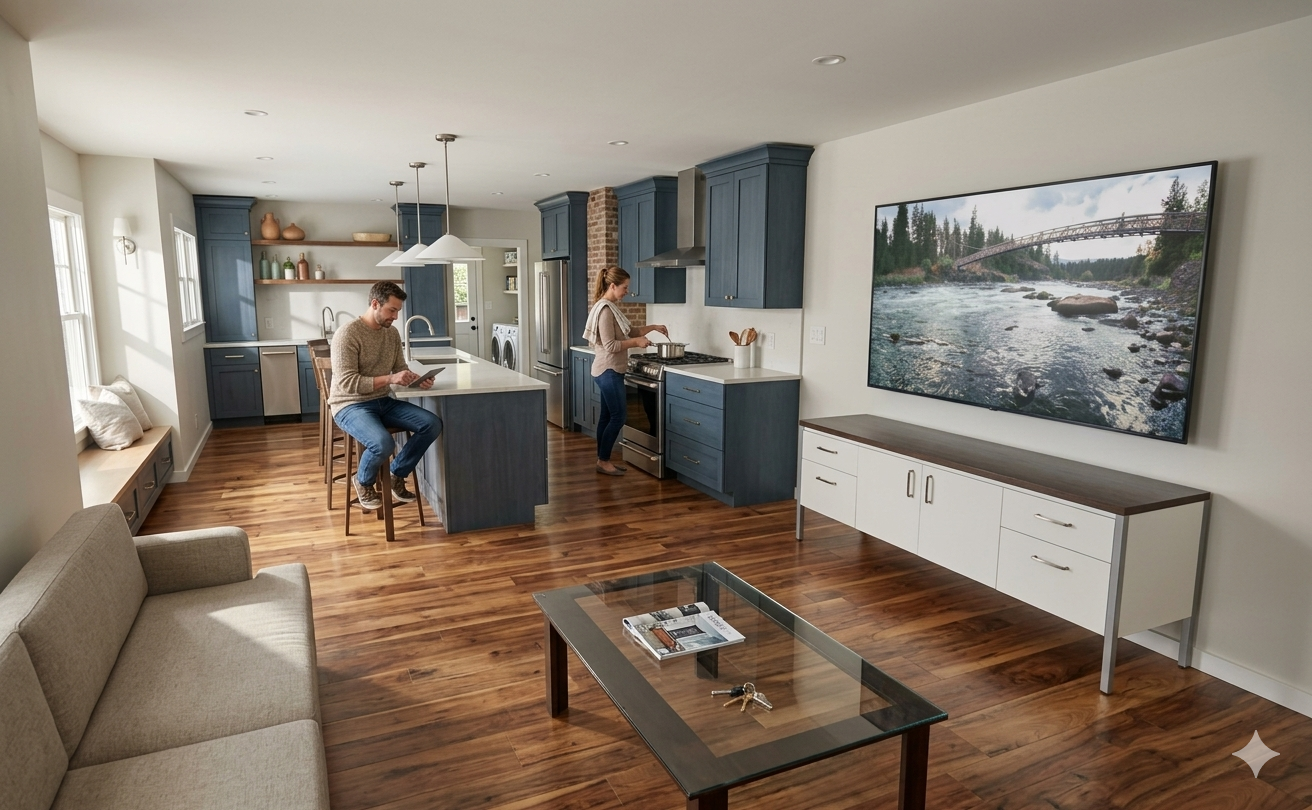
We’re going to go from this…
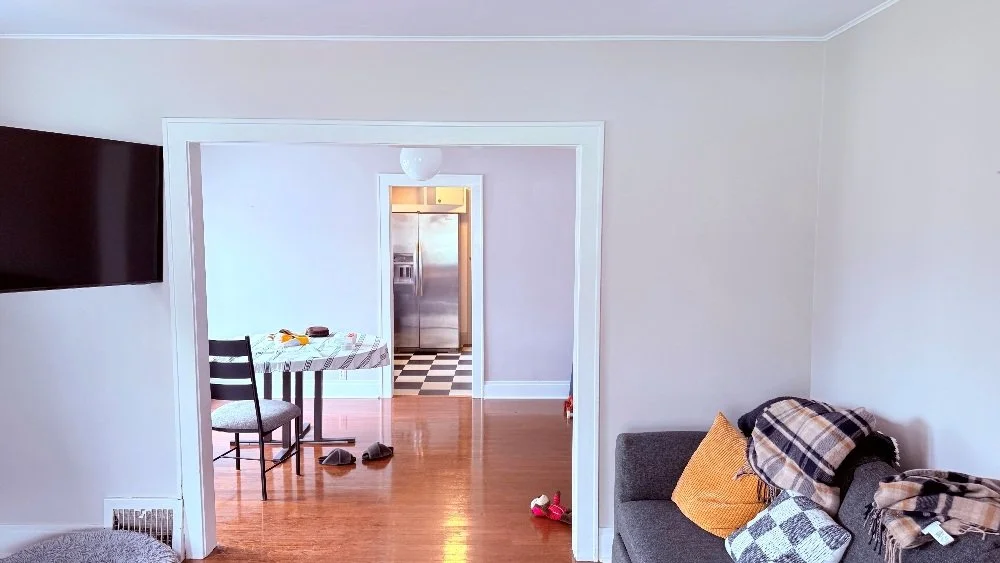
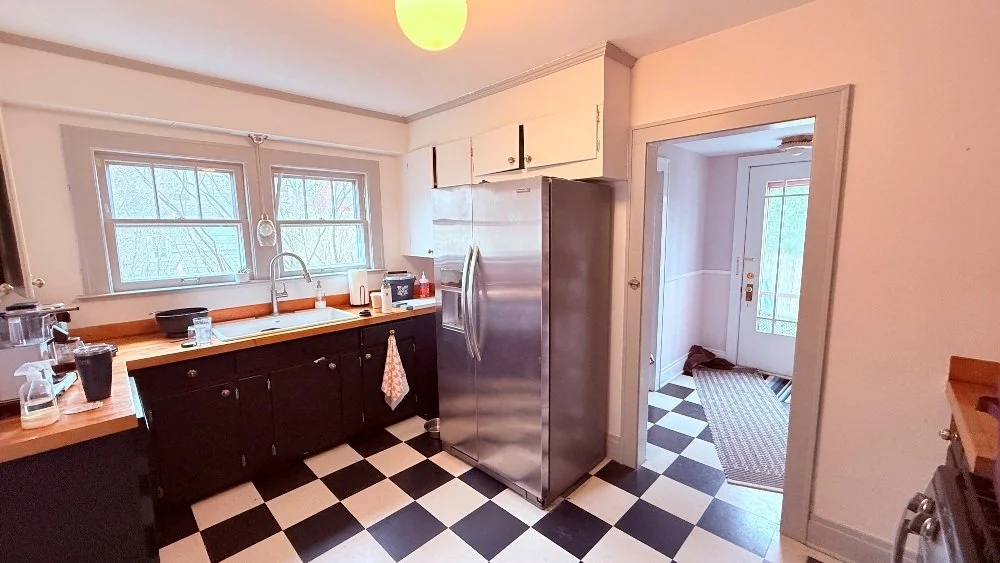
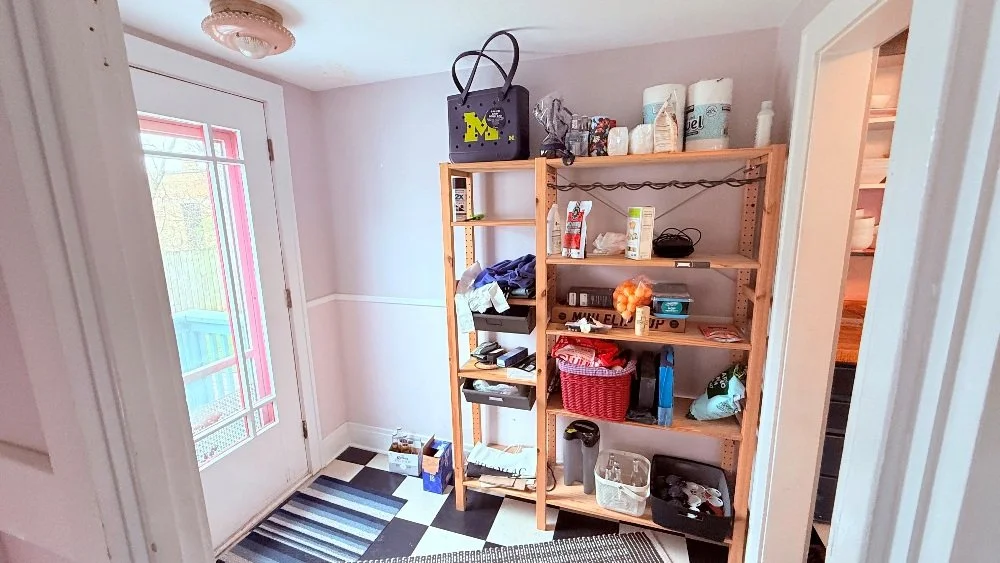
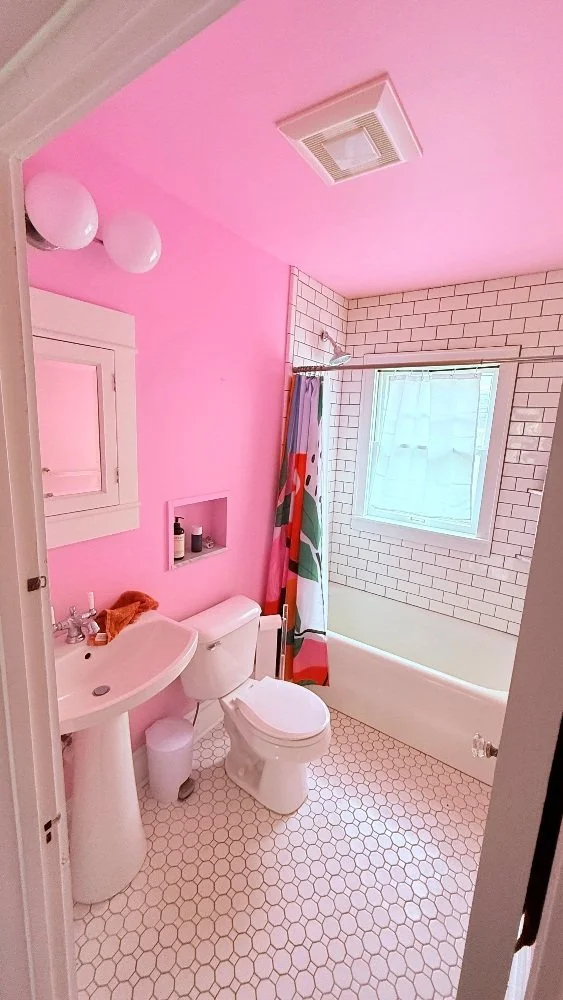
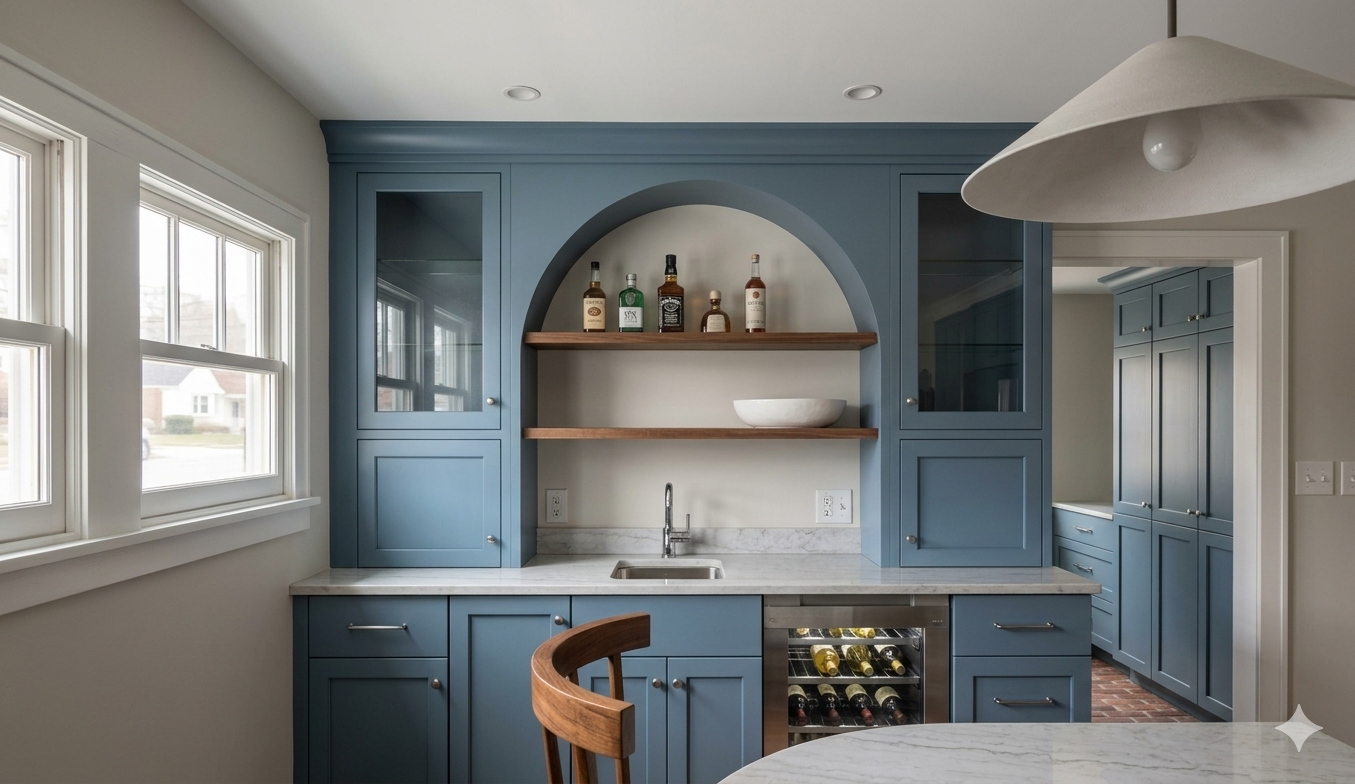
to this! The bar area was recently updated to include a gorgeous arch.
Demolition Phase: The Clean Slate
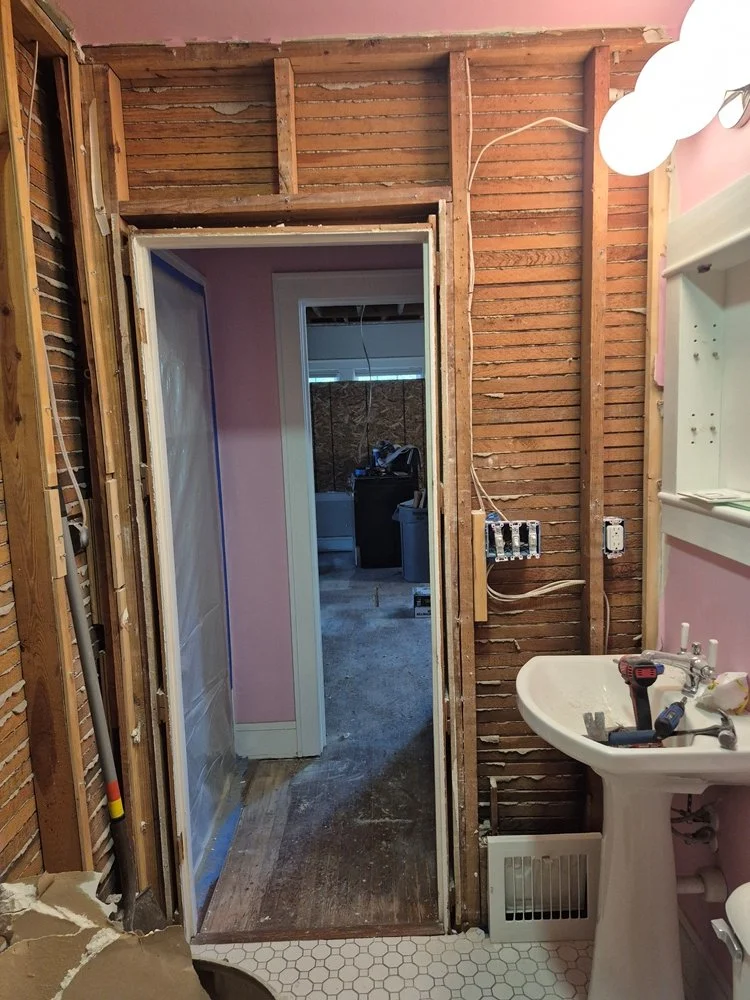
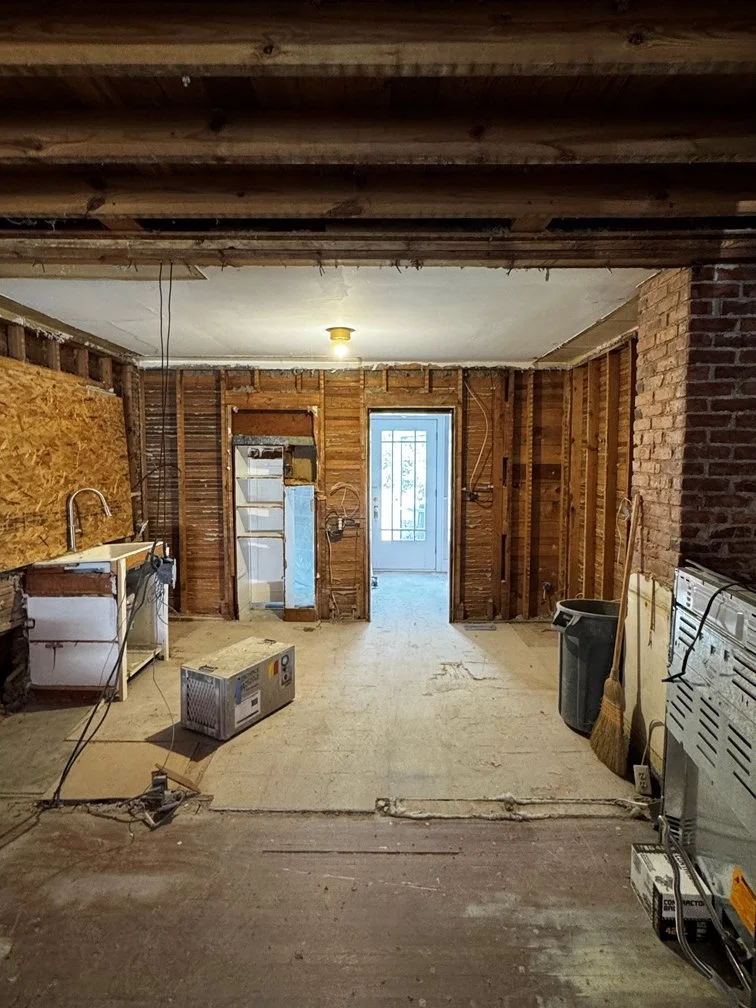
Following our standard site preparation protocols, we began by meticulously protecting the existing architectural elements of this 1918 Sears kit house before moving into a clean and organized demolition phase. Stripping the first floor down to the studs has revealed the home's historic lath and framing, providing the clean slate necessary to transition from a compartmentalized layout to a modern, open-concept entertainment space. Just removing the walls, the space already looks massive.
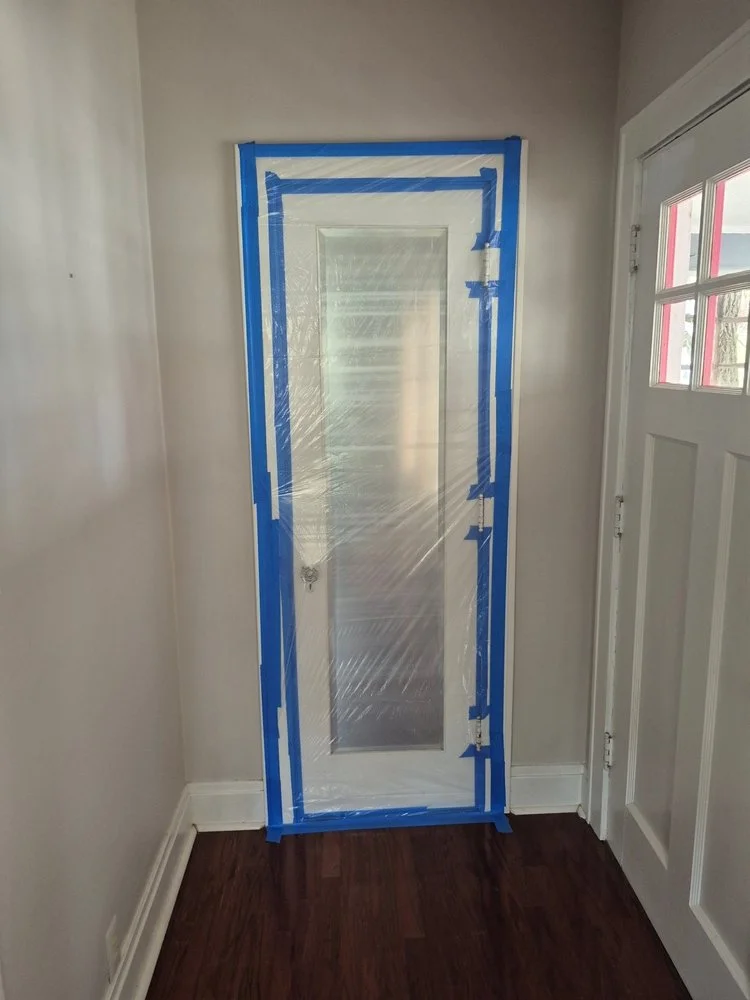
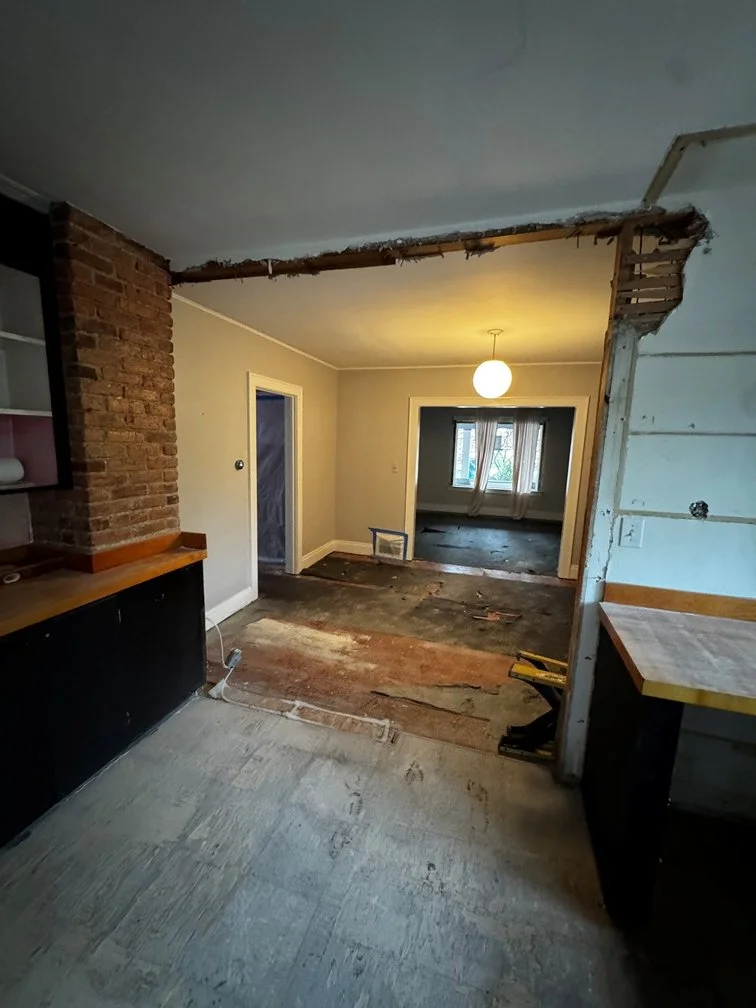
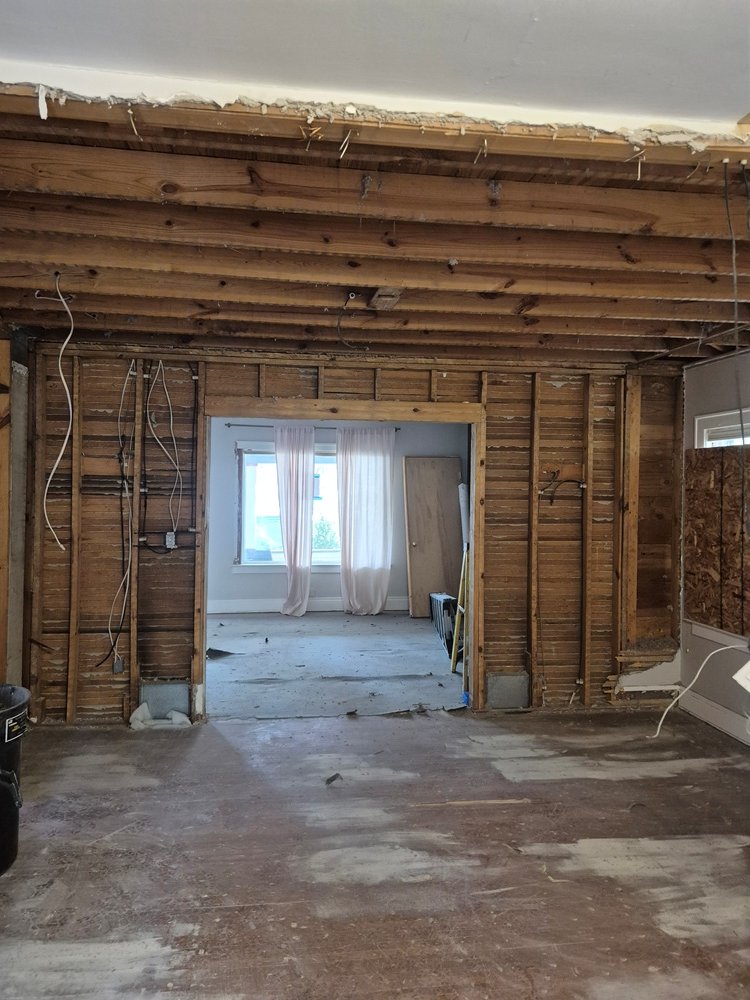
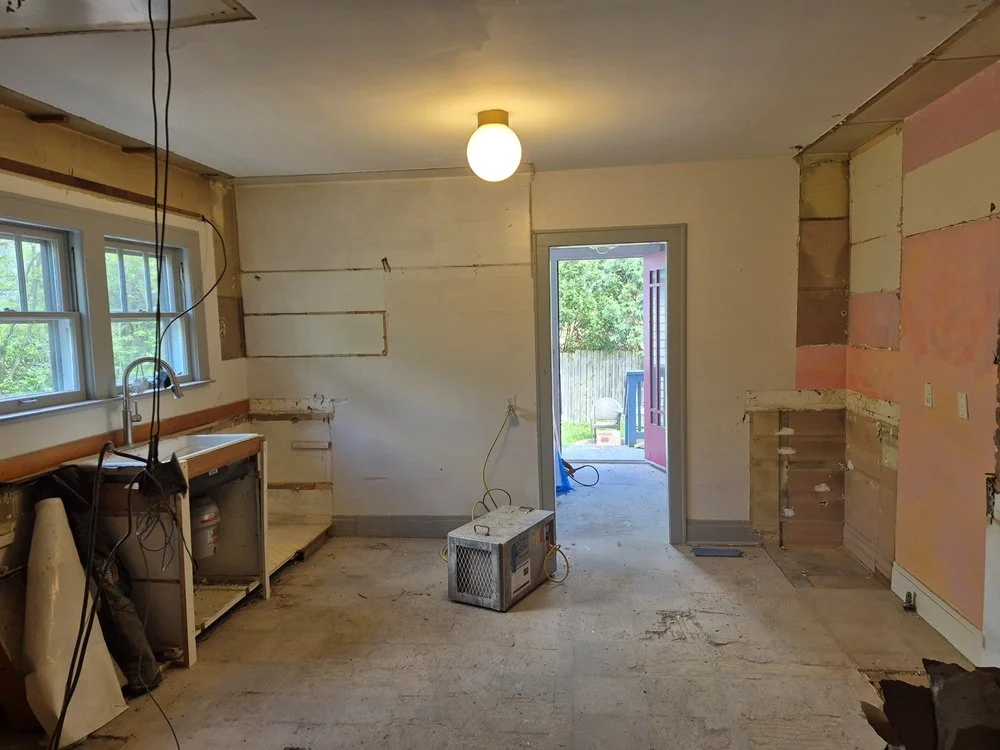
Framing & Rough Ins Phase: Skeleton, Scale and Infrastructure
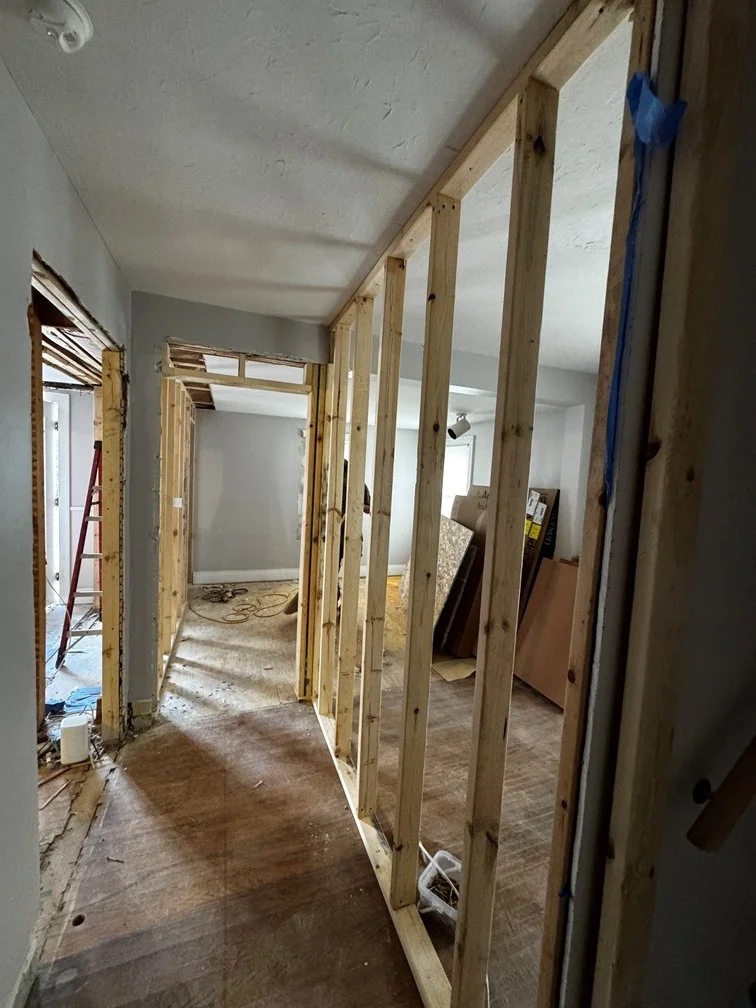
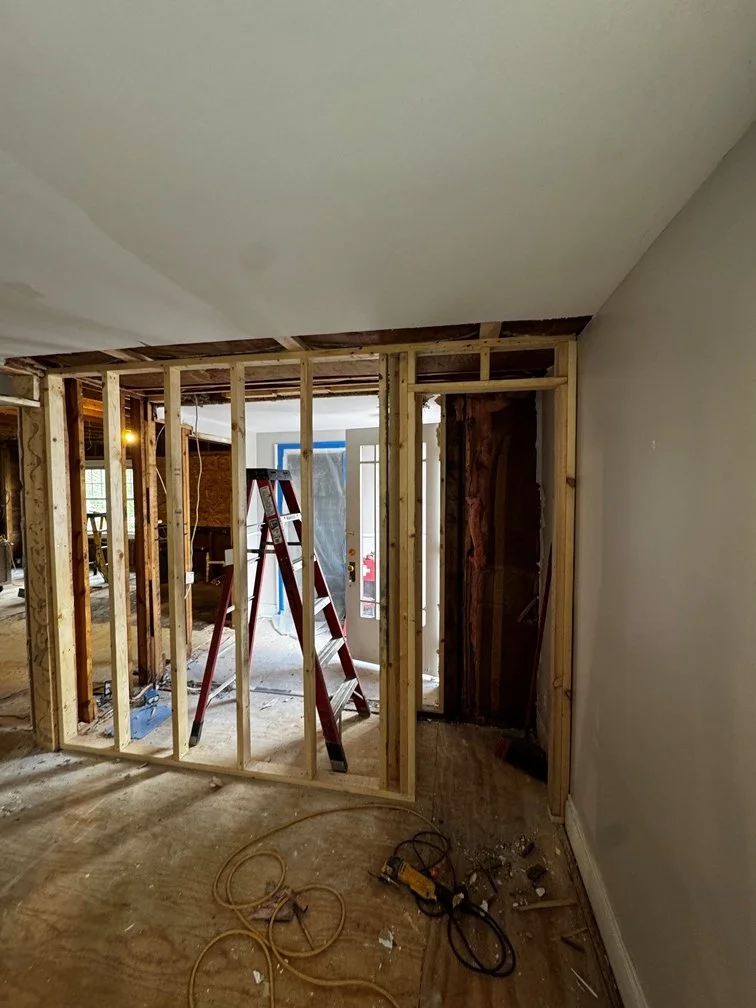
With the first floor stripped to the studs, the new framing is up, revealing the open-concept footprint that replaces the old, compartmentalized layout. This phase is all about the infrastructure—the structural updates and the routing of new plumbing, electrical, and HVAC lines that handle modern performance requirements behind the scenes. The mechanical and framing teams worked within the constraints of the 1918 kit house structure, updating the core utilities without disrupting the home's original architectural integrity. With the structural milestones met and the rough-ins approved, the mechanical infrastructure is set, and the project is ready to transition to the Drywall & Priming phase to start enclosing the space.
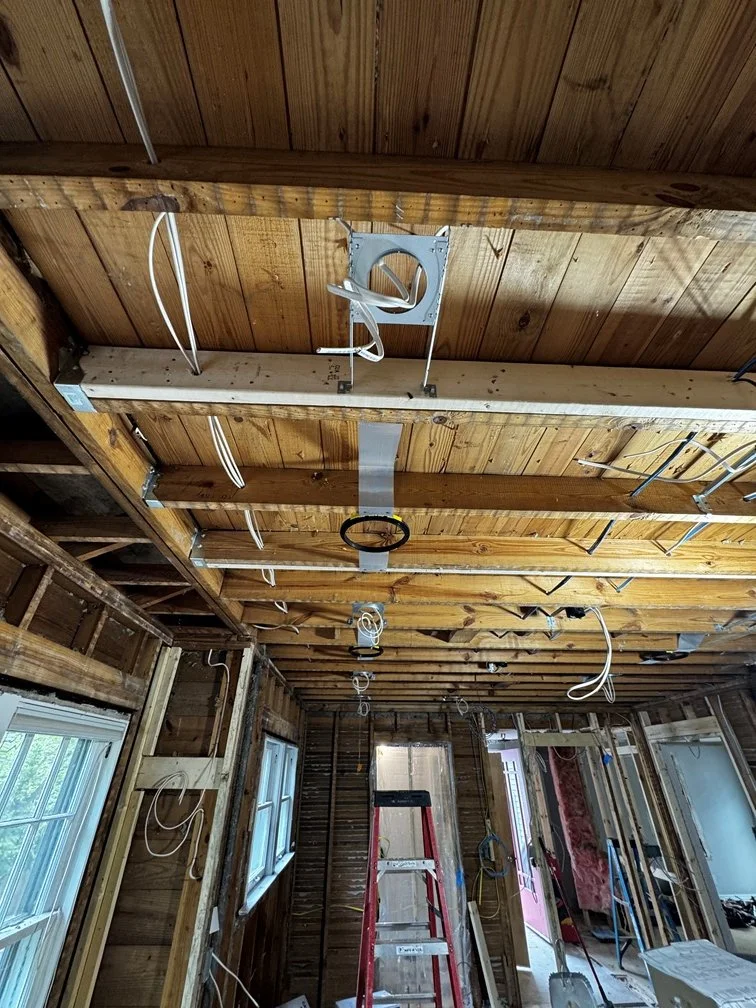
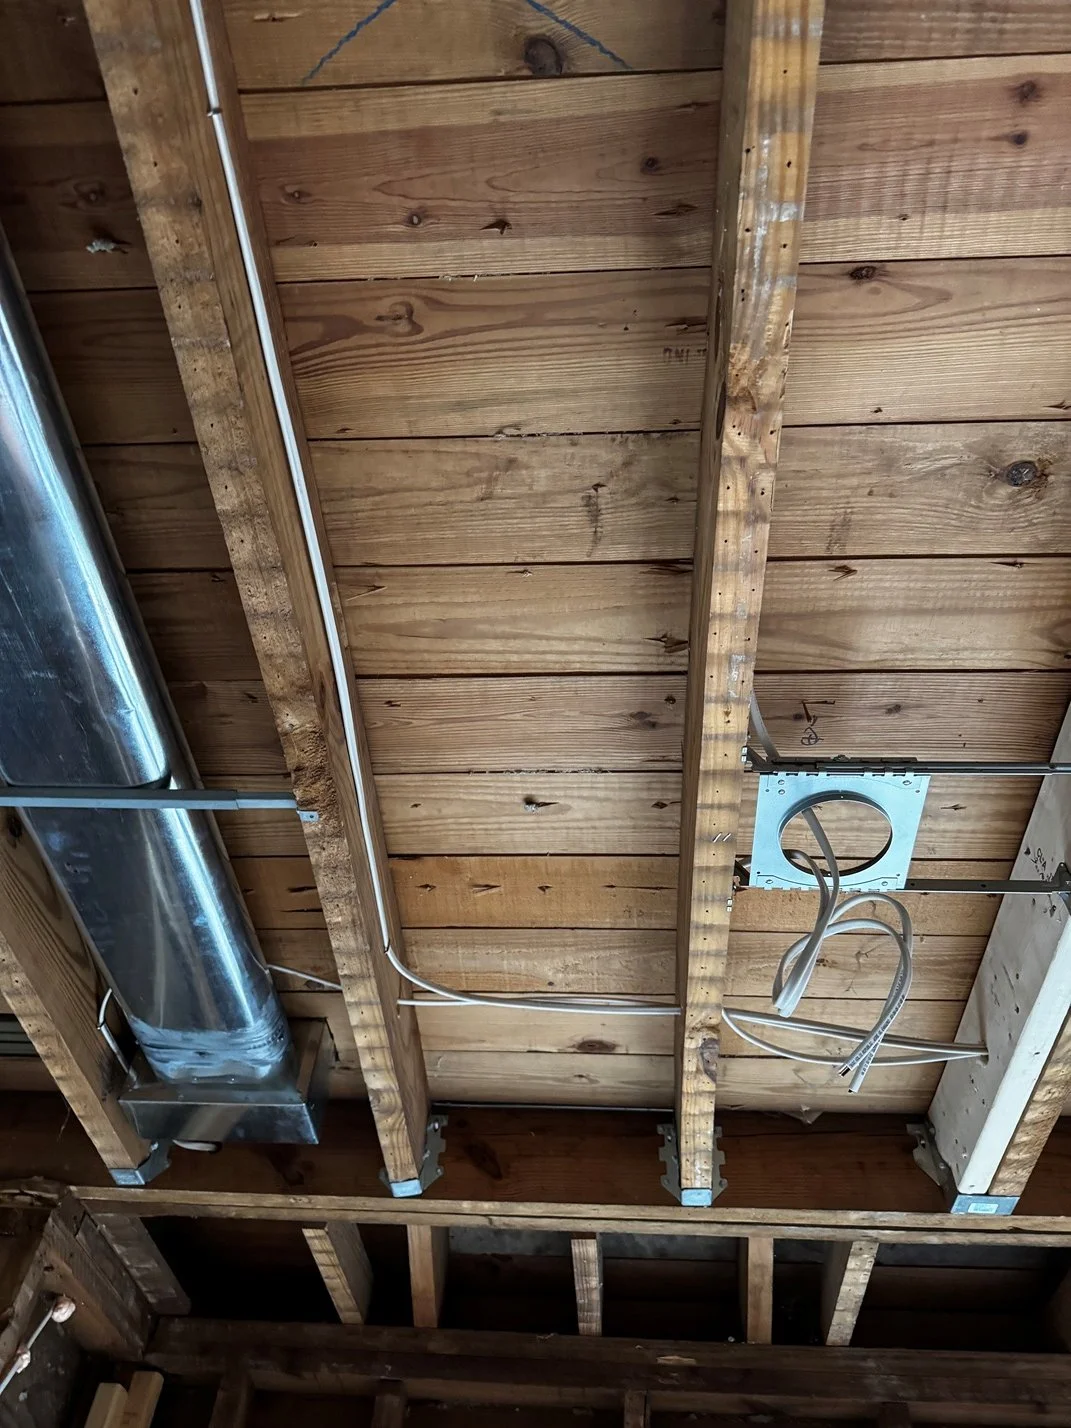
Once all the mechanicals are in, we can start the insulation process.
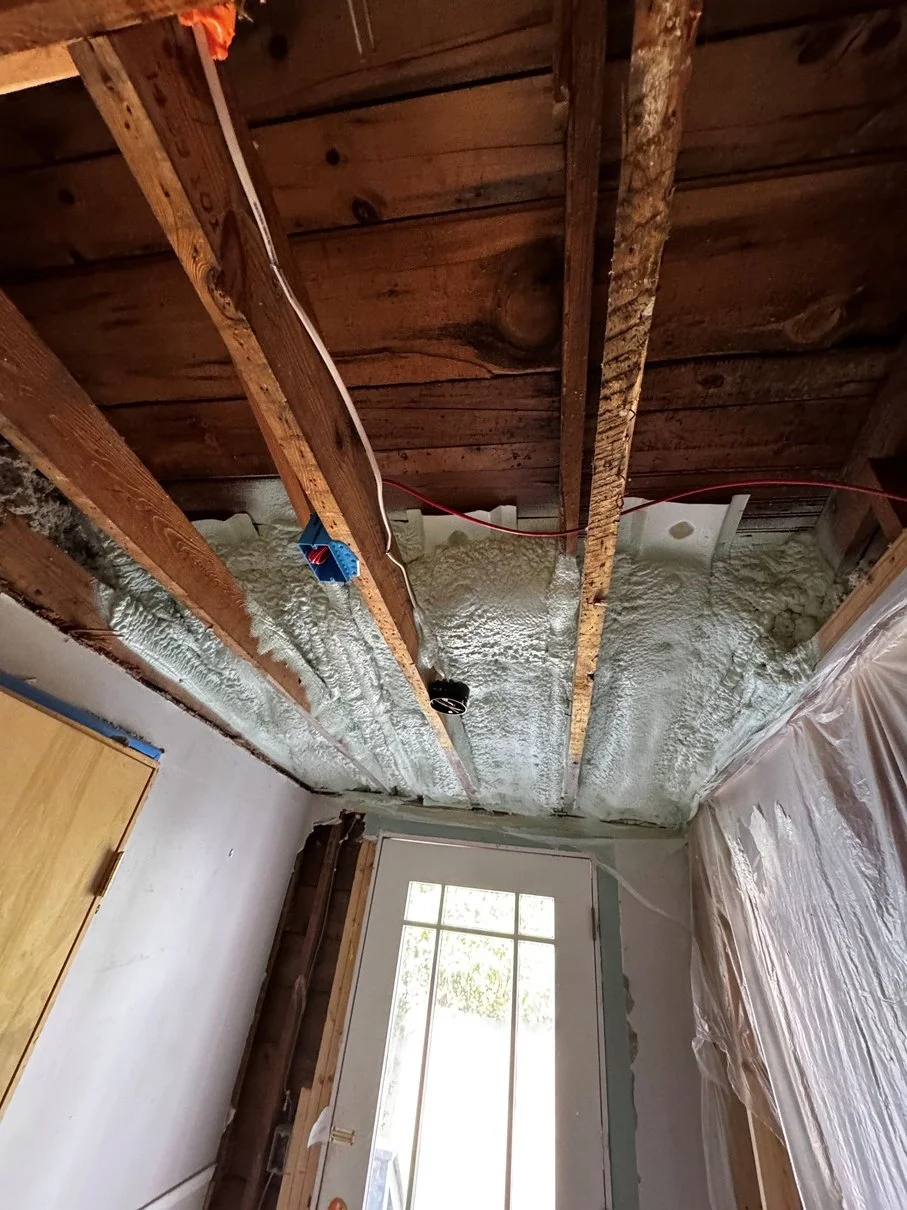
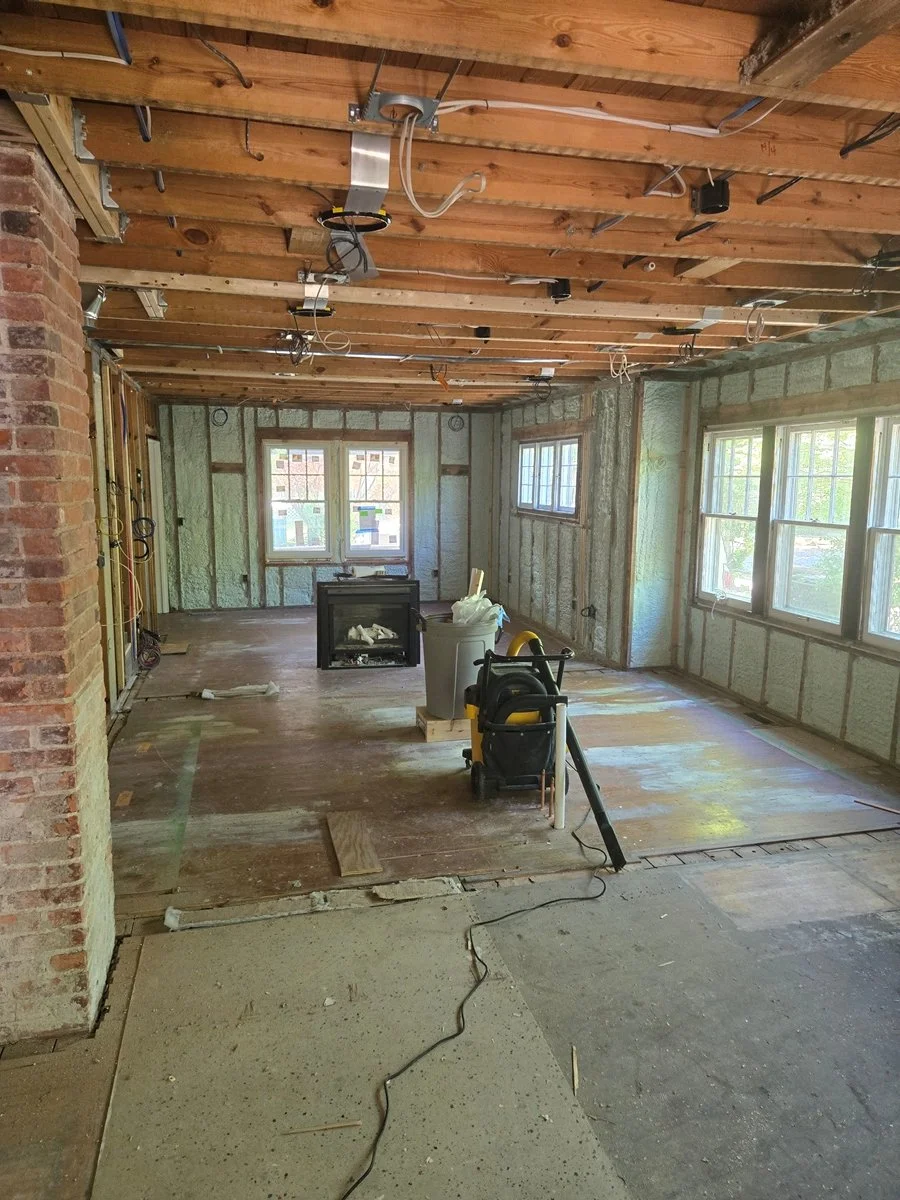
Drywall & Priming Phase
Moving into the drywall, taping, and priming phase. We’ll be closing up the walls and applying the first layers of compound and primer completely shifts the dynamics of the site as the individual spaces begin to blend together.
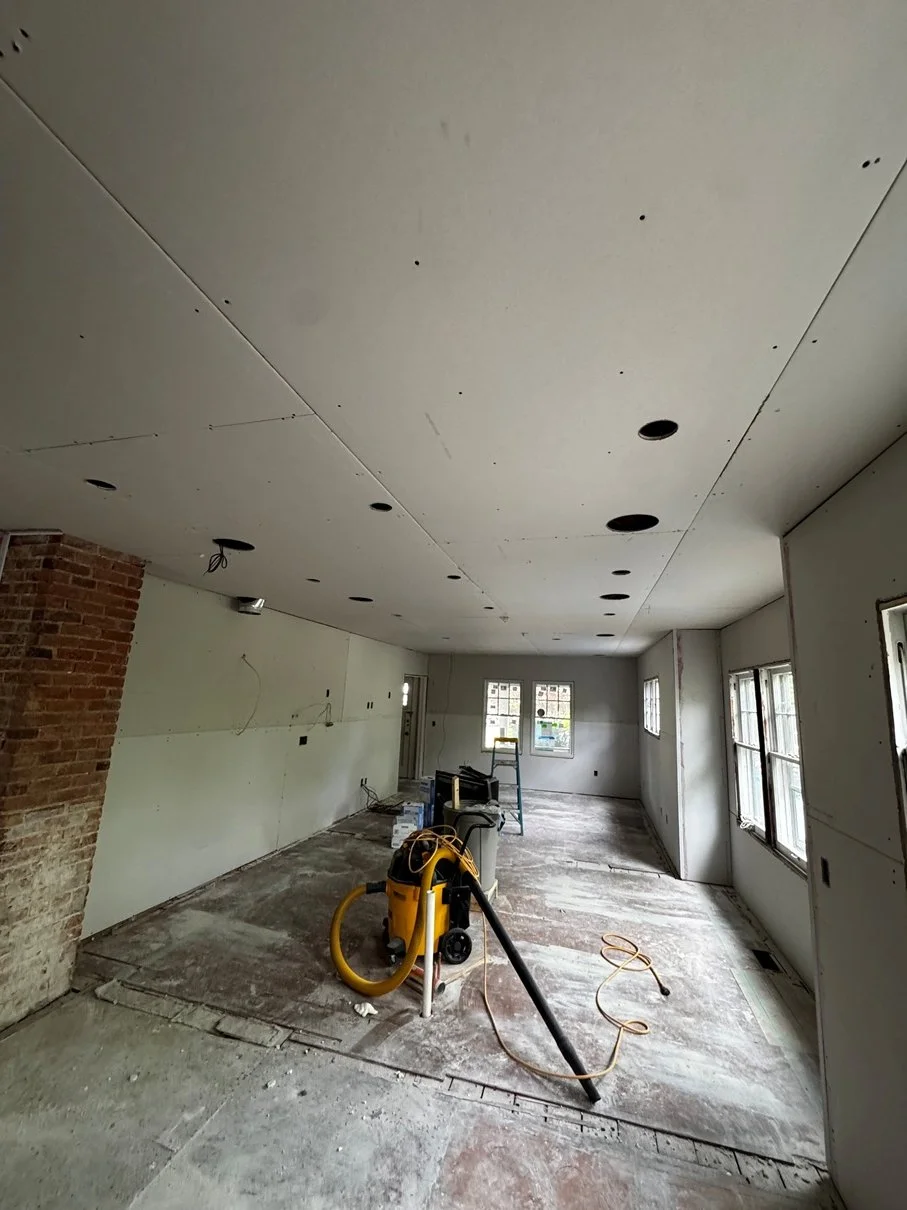
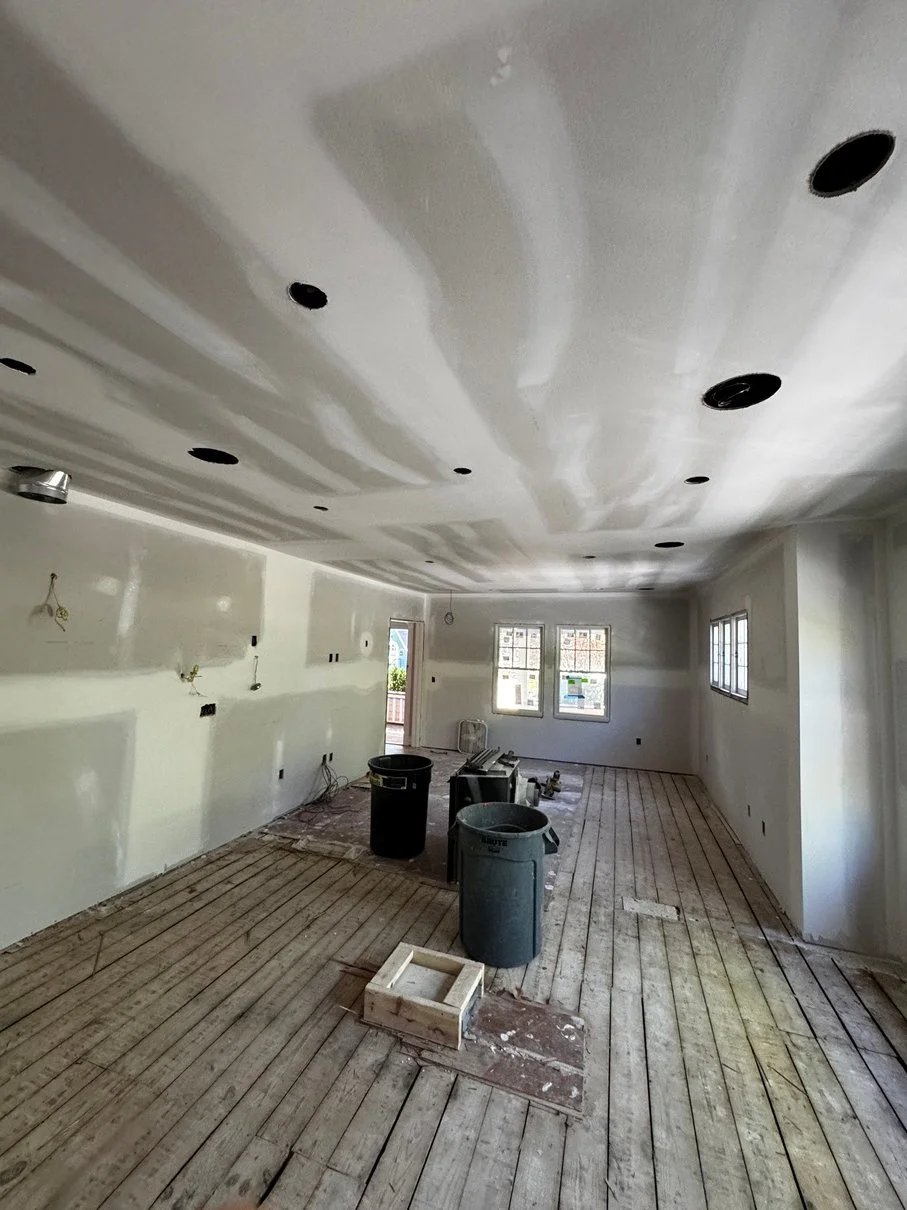
Initial drywall installation across the newly opened first floor. The boards are hung on the walls and ceiling, with cutouts completed for the recessed lighting layout. Taping and mudding progress. Joint compound has been applied to the seams, corners, and fastener points across the walls and ceiling plane, bridging the gaps between panels to establish a flat, continuous surface.
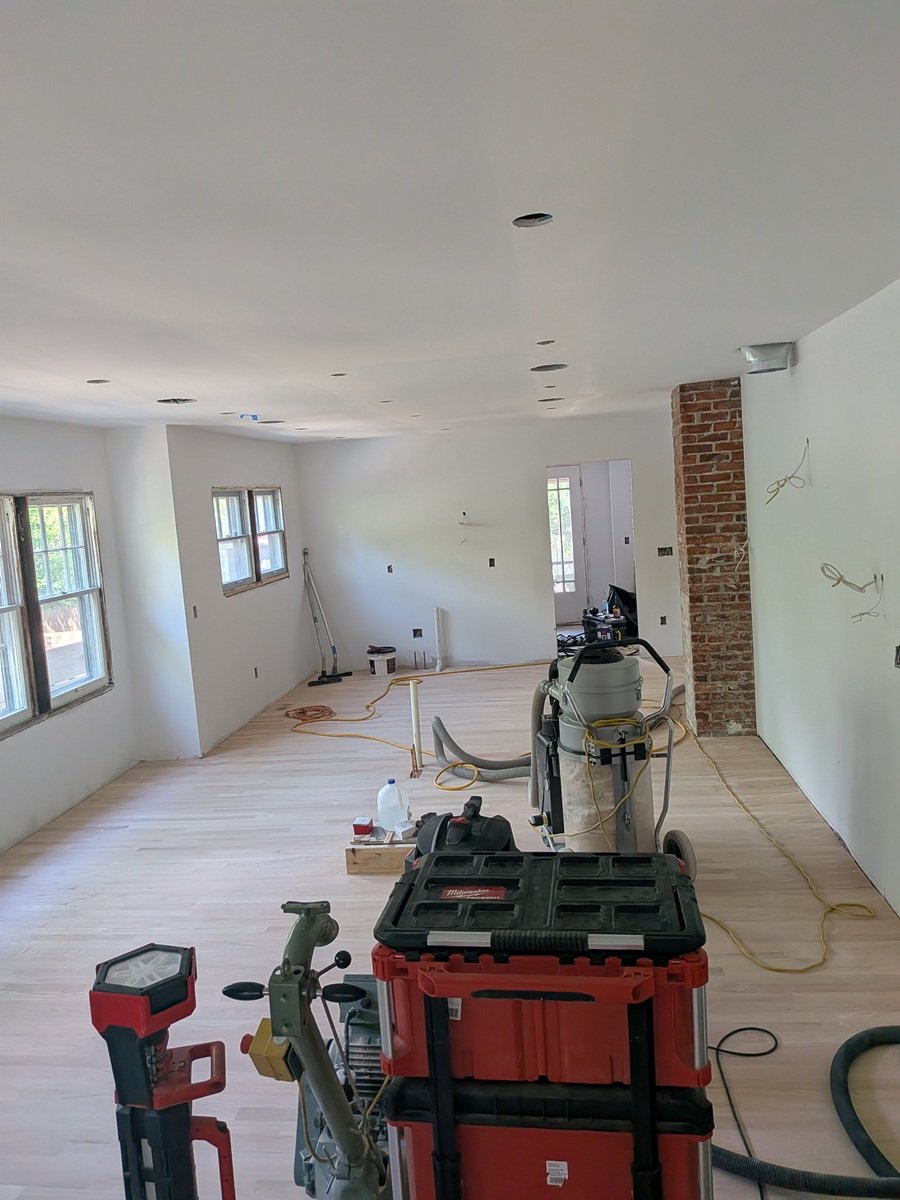
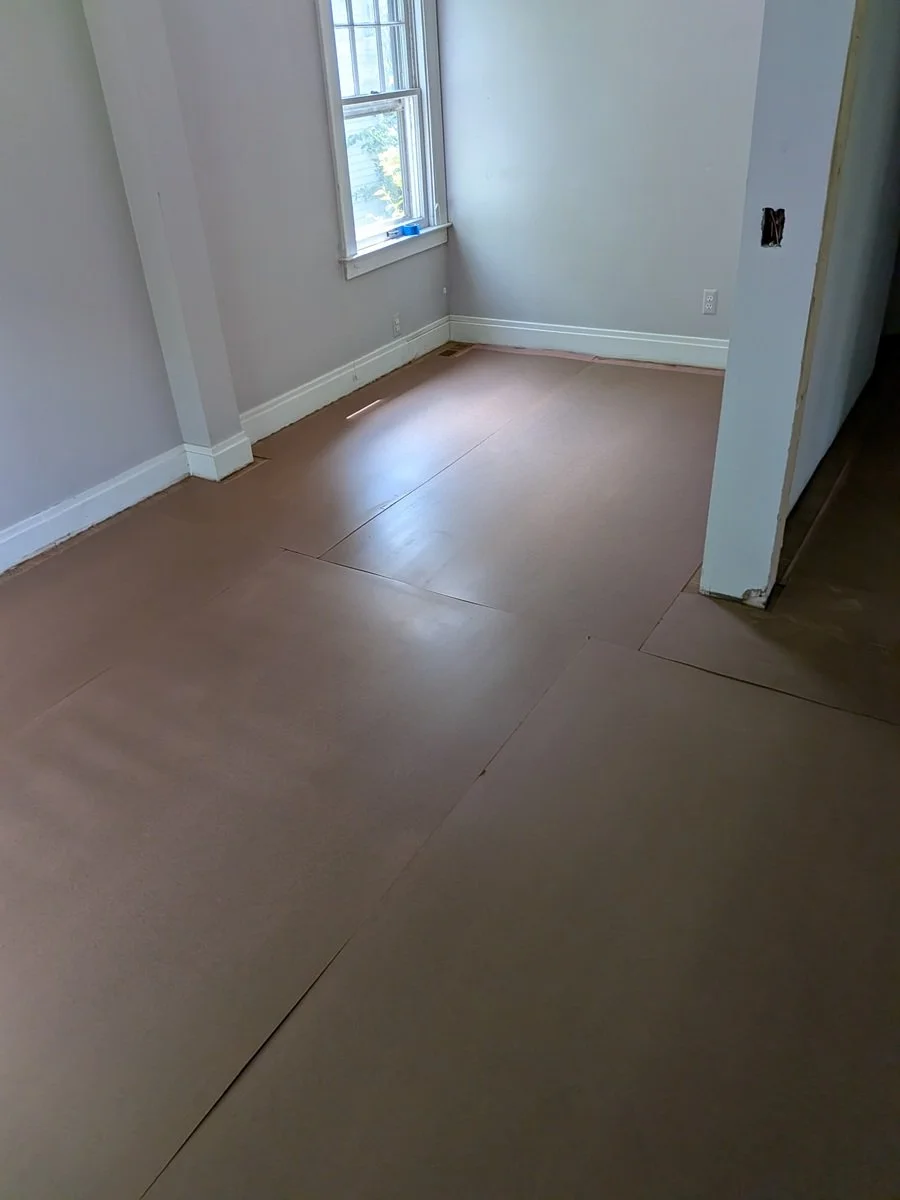
The space following the completion of sanding and the application of the primer coat. The white primer unifies the walls and ceiling, providing a consistent substrate for final paint while highlighting the open volume of the floor plan. Heavy-duty floor protection paper is laid down and secured to protect the underlying boards from foot traffic, dust, and subsequent trade work during the upcoming finishing steps.
Cabinetry Phase: The Art of the Space
This stage marks the transition from basic structural surfaces to the functional and architectural layout of the kitchen and living areas. As the base units, wall cabinets, and island structures are leveled, anchored, and aligned, the spatial flow of the open-concept first floor becomes fully defined.
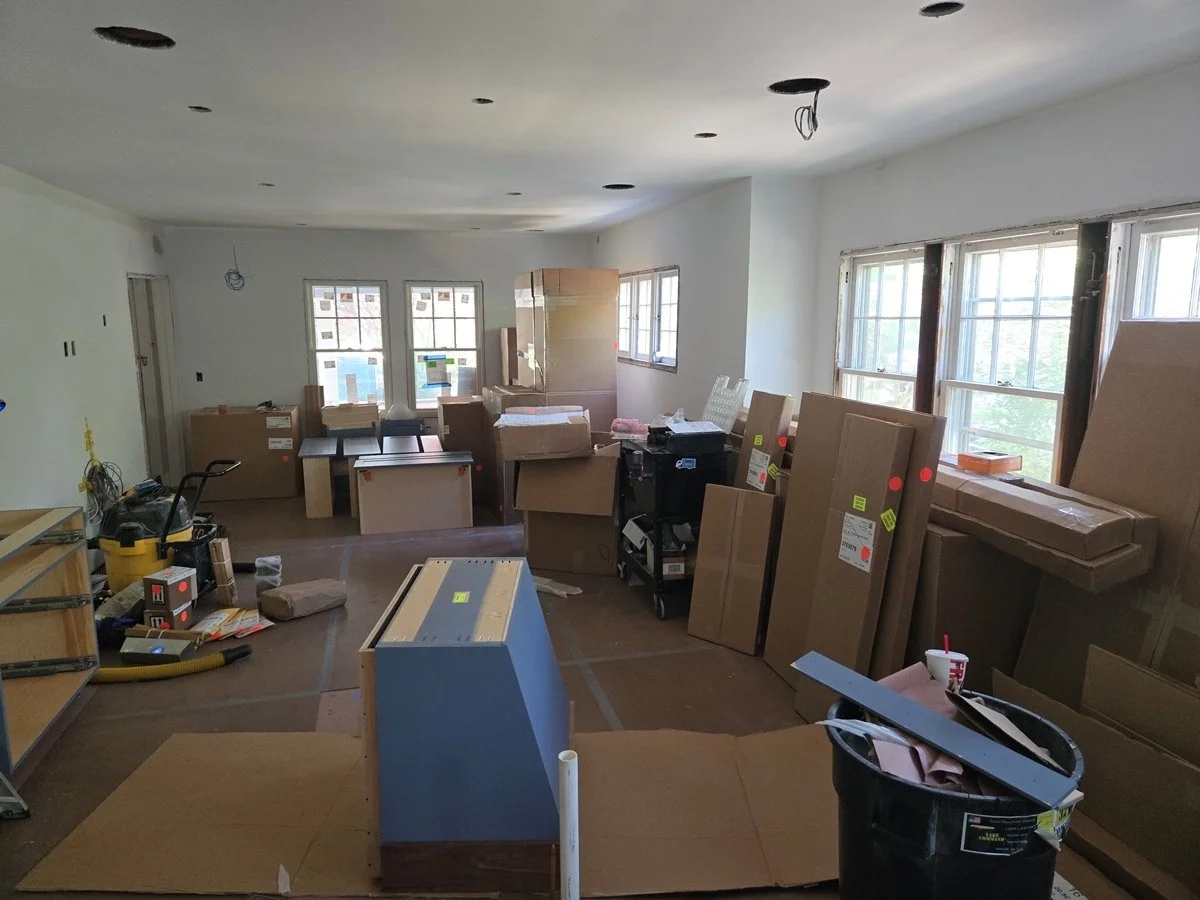
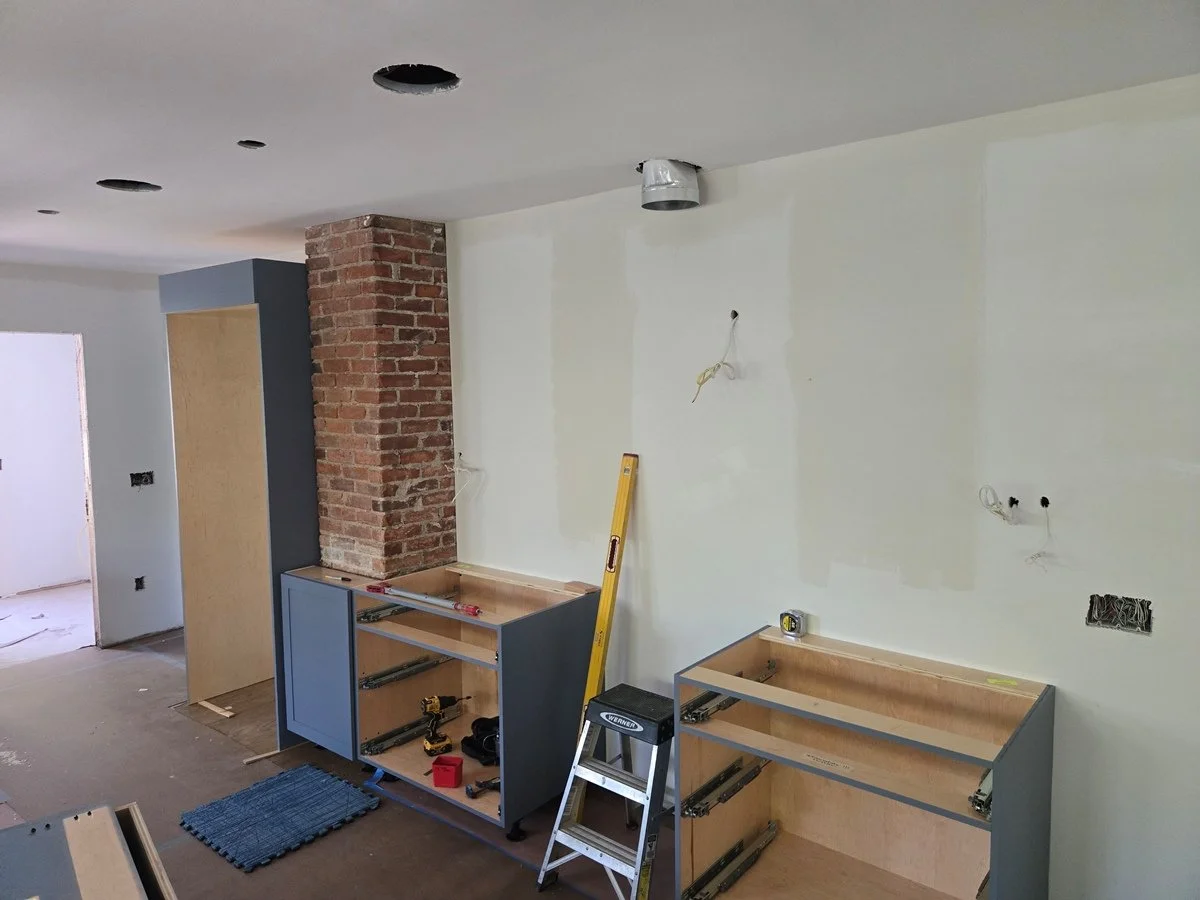
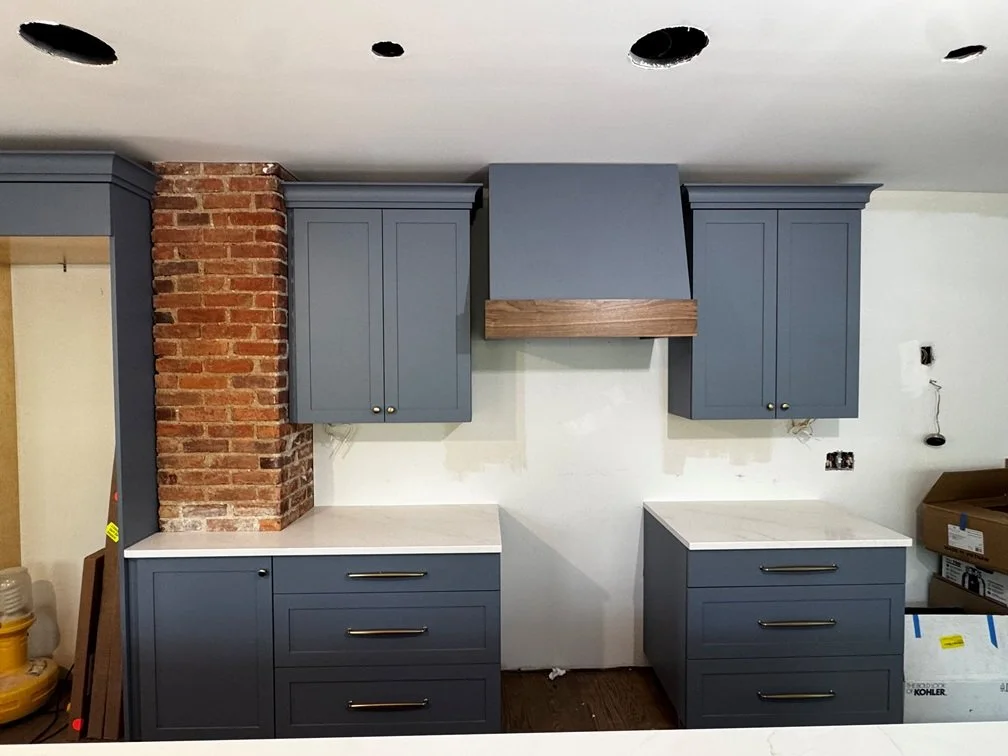
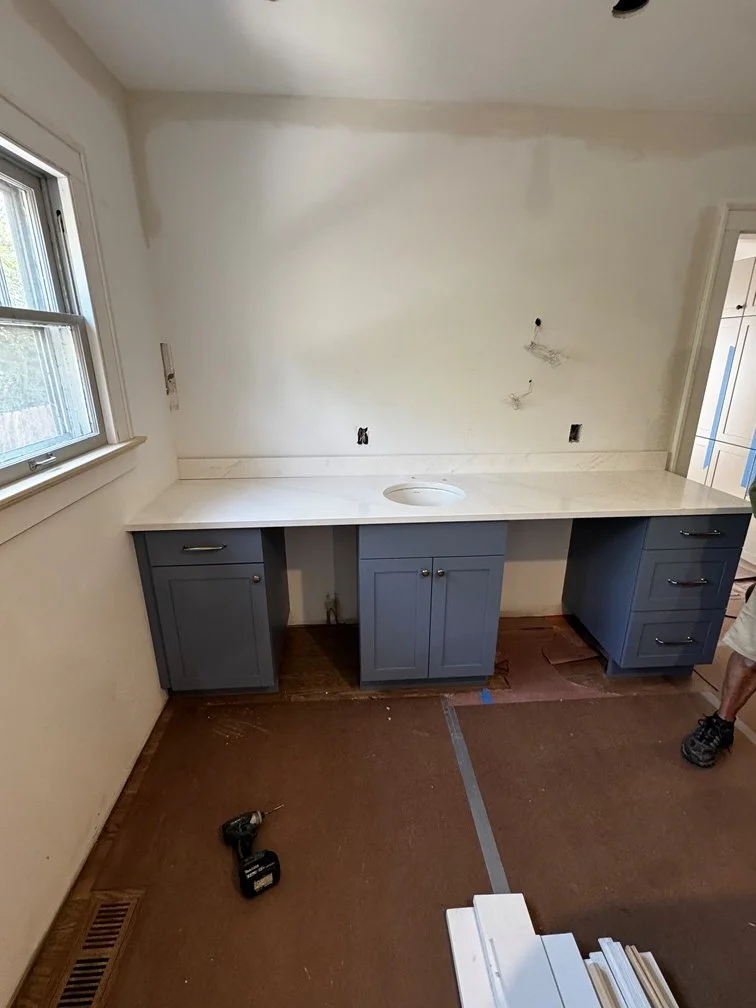
The unboxing and staging area on-site. Cabinet units, trim components, and specialized hardware are organized across the protected flooring, allowing the team to cross-reference the layout design and verify inventory before mounting begins. Installation of the perimeter base cabinets along the main kitchen wall. Laser levels, shims, and high-precision levels are utilized to ensure the boxes are perfectly plumb and aligned across the subfloor, adjacent to the exposed brick feature column.
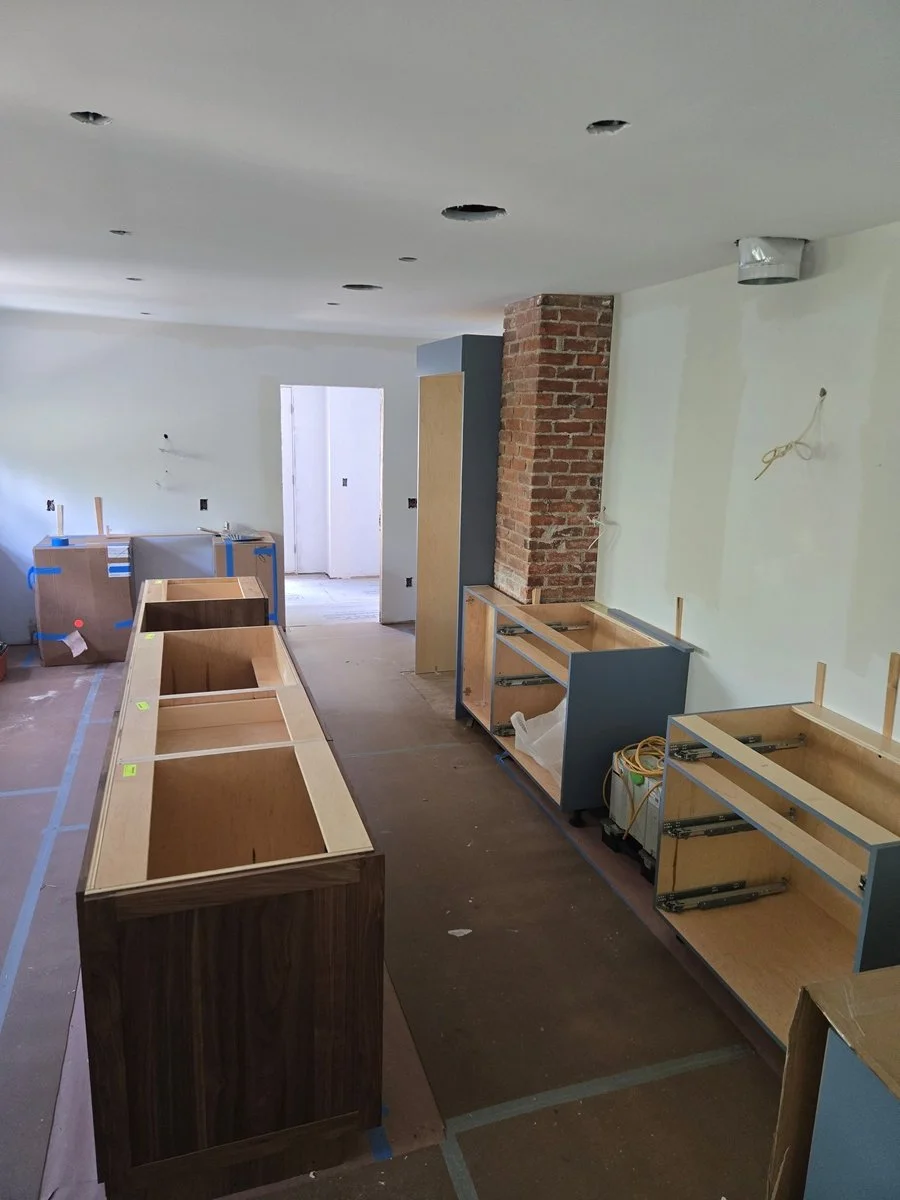
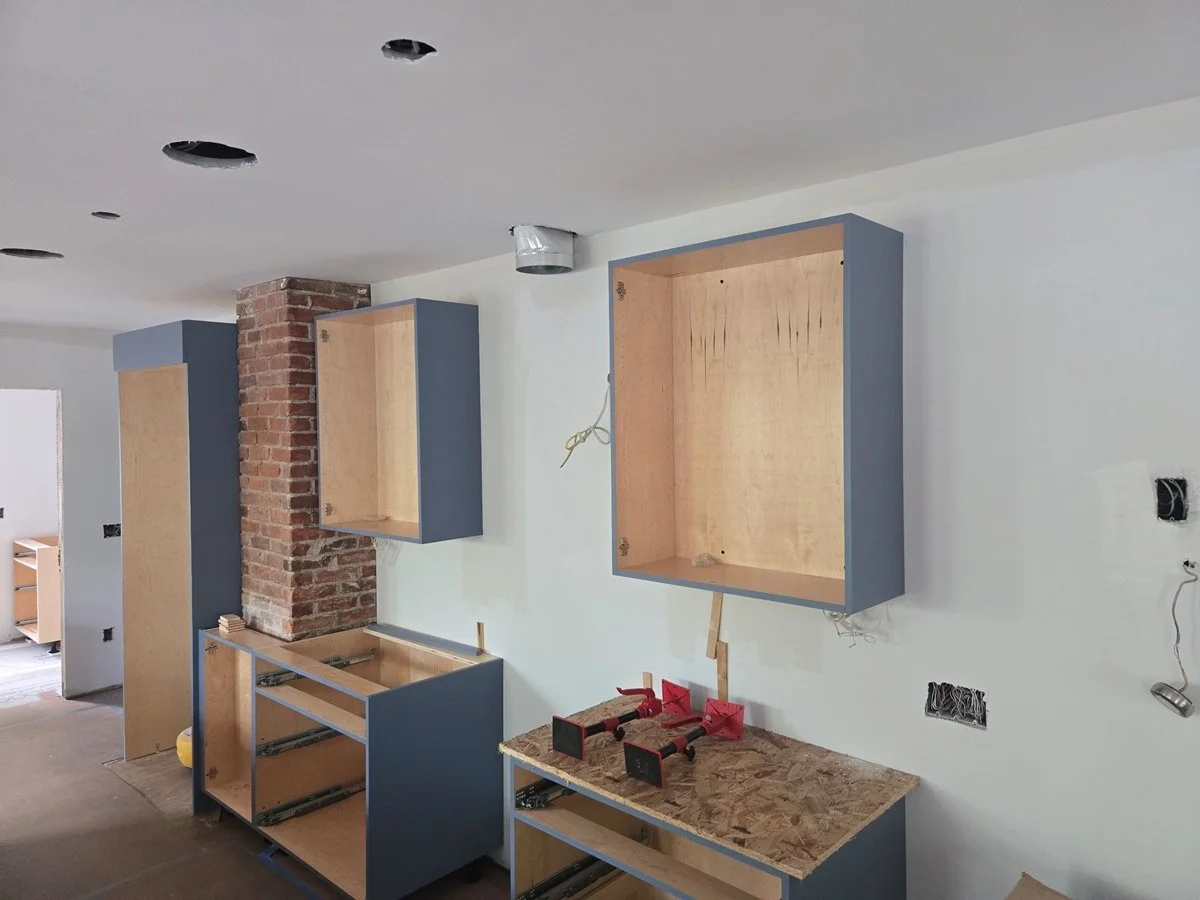
Placement of the central kitchen island units alongside the perimeter layout. The island cabinetry establishes the central work and traffic paths of the open floor plan, anchoring the space between the kitchen prep zones and the surrounding living areas. Mounting and integration of the upper wall cabinets. The upper units are anchored securely to the wall framing, flanking the brick column and rough-ins for the ventilation hood, completing the structural footprint of the kitchen storage.
The Tile Phase Takes Shape
The transformation on the Old West Side is moving right along, and we have officially reached one of our favorite milestones: tile installation. This phase is where craftsmanship truly shines, turning blank backer boards and empty surfaces into richly textured, character-rich focal points. From intricate geometric floor patterns to classic vertical wall tiles, every piece requires precision alignment—especially when working around custom cabinetry, range hoods, and historic window frames.
Here is a look at how the tilework is coming together across the home:
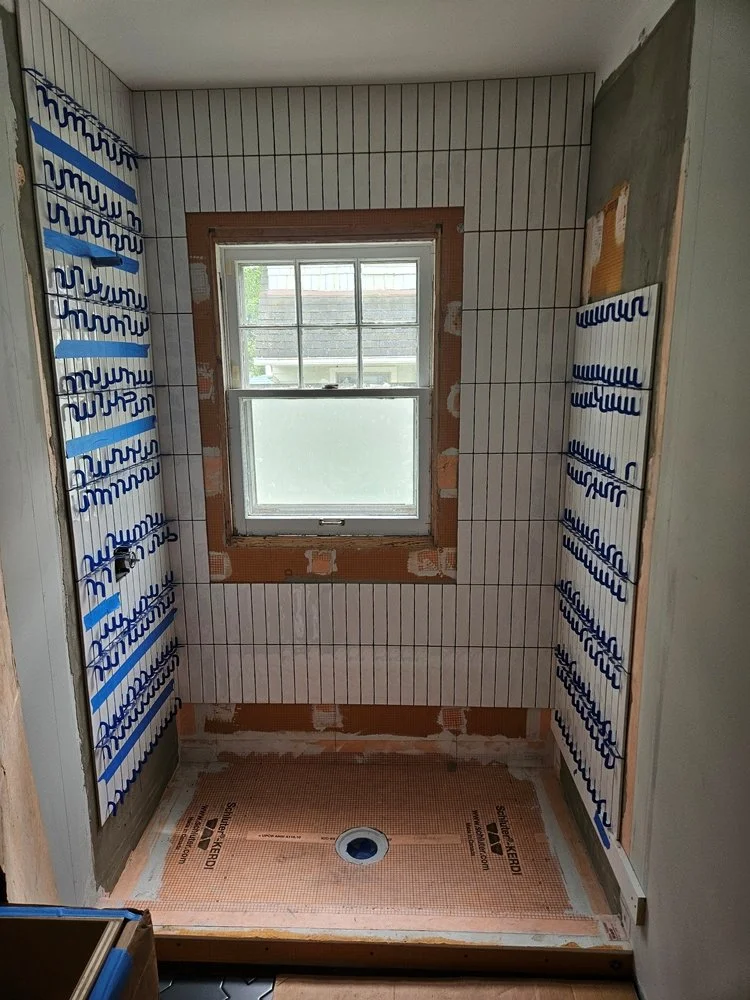
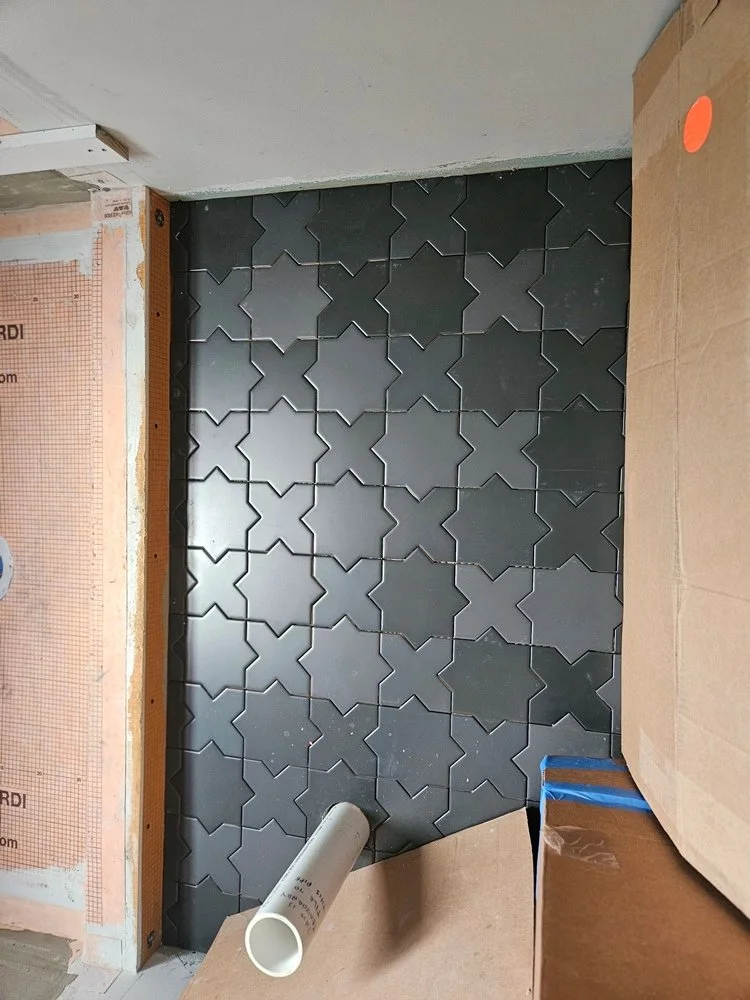
Progress shot of the shower surround during installation, featuring white vertical wall tiles lining the walls around the window and Schluter-KERDI waterproofing systems on the curb and shower pan. And a close-up of dark geometric star-and-cross floor tiles being carefully laid and leveled near a transition wall.
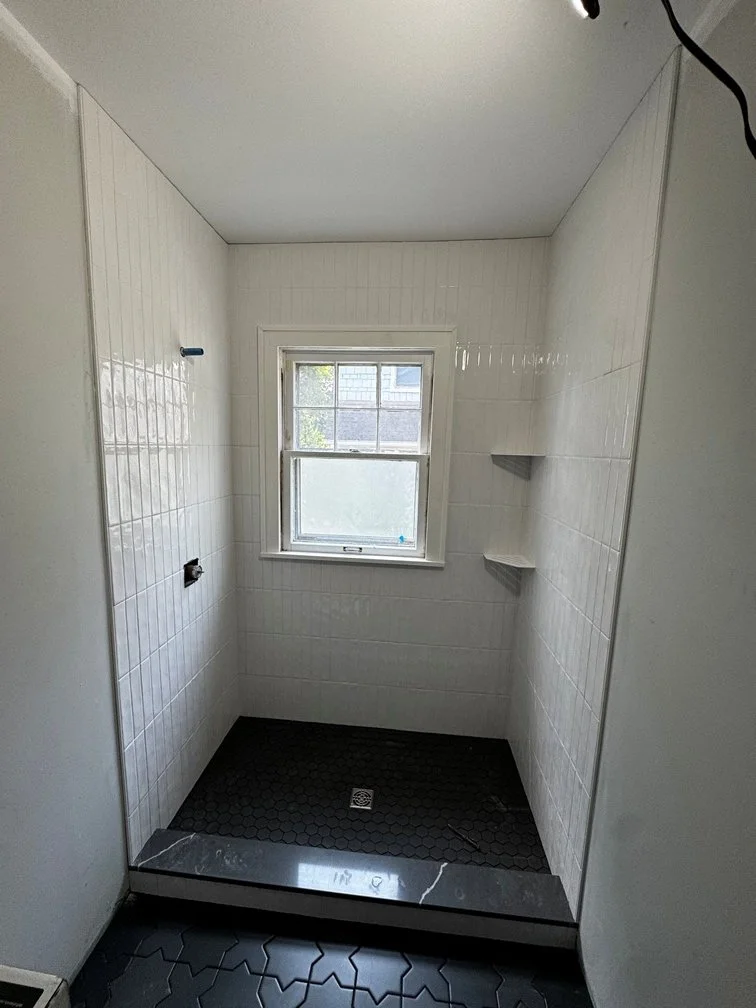
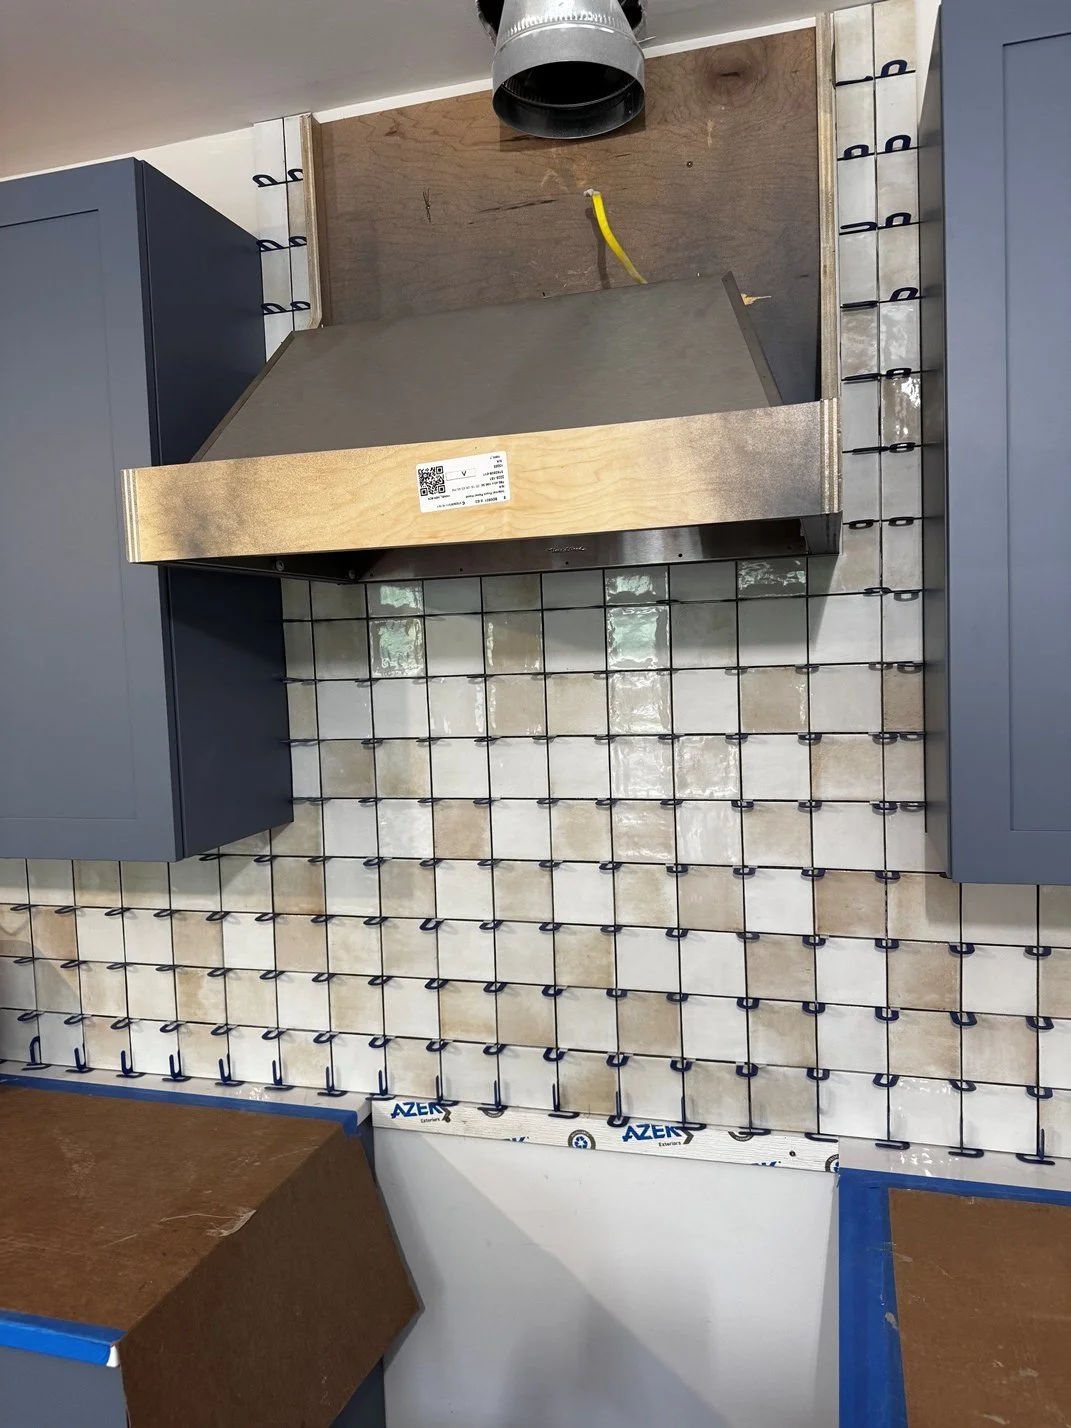
The completed shower enclosure showcasing white vertical wall tiles, a dark hex-tile shower floor, floating corner shelves, and a contrasting dark stone threshold. Meanwhile, the kitchen backsplash installation is in progress beneath blue cabinetry, featuring glazed square tiles with a subtle artisanal variation pattern fitted around the custom wood range hood.
Trim, Hardware & Doors - The Ornamental Details
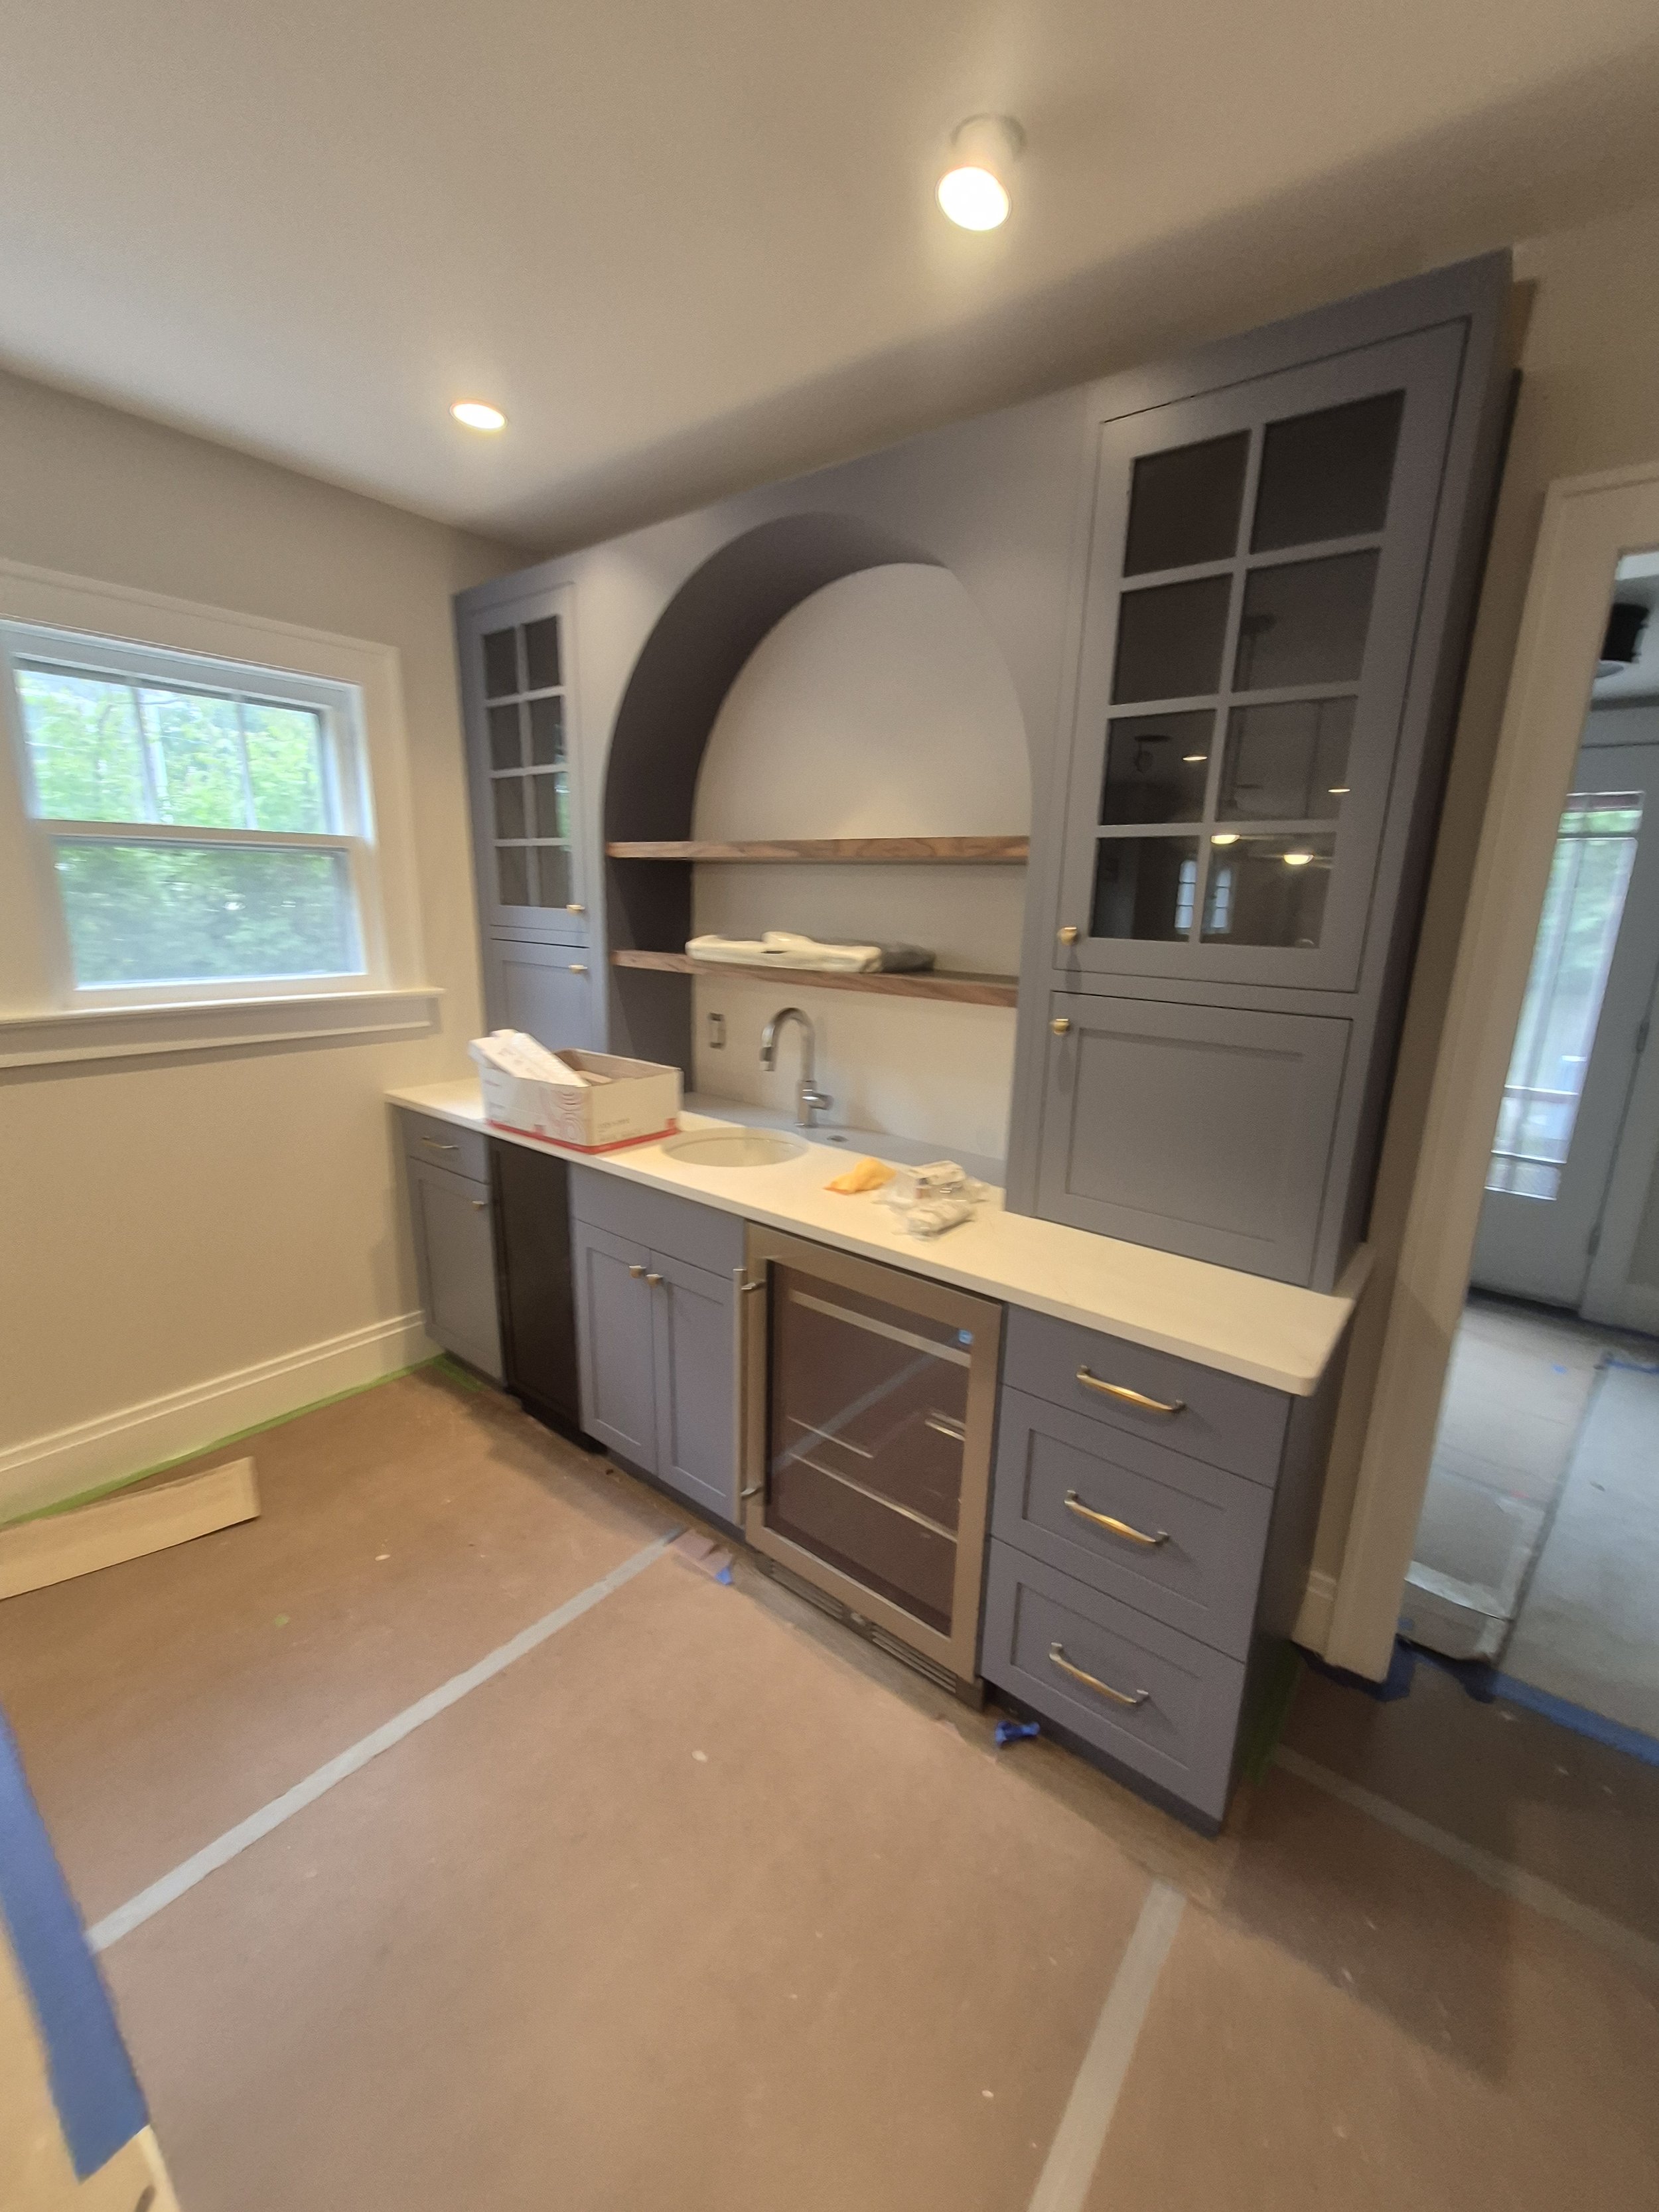
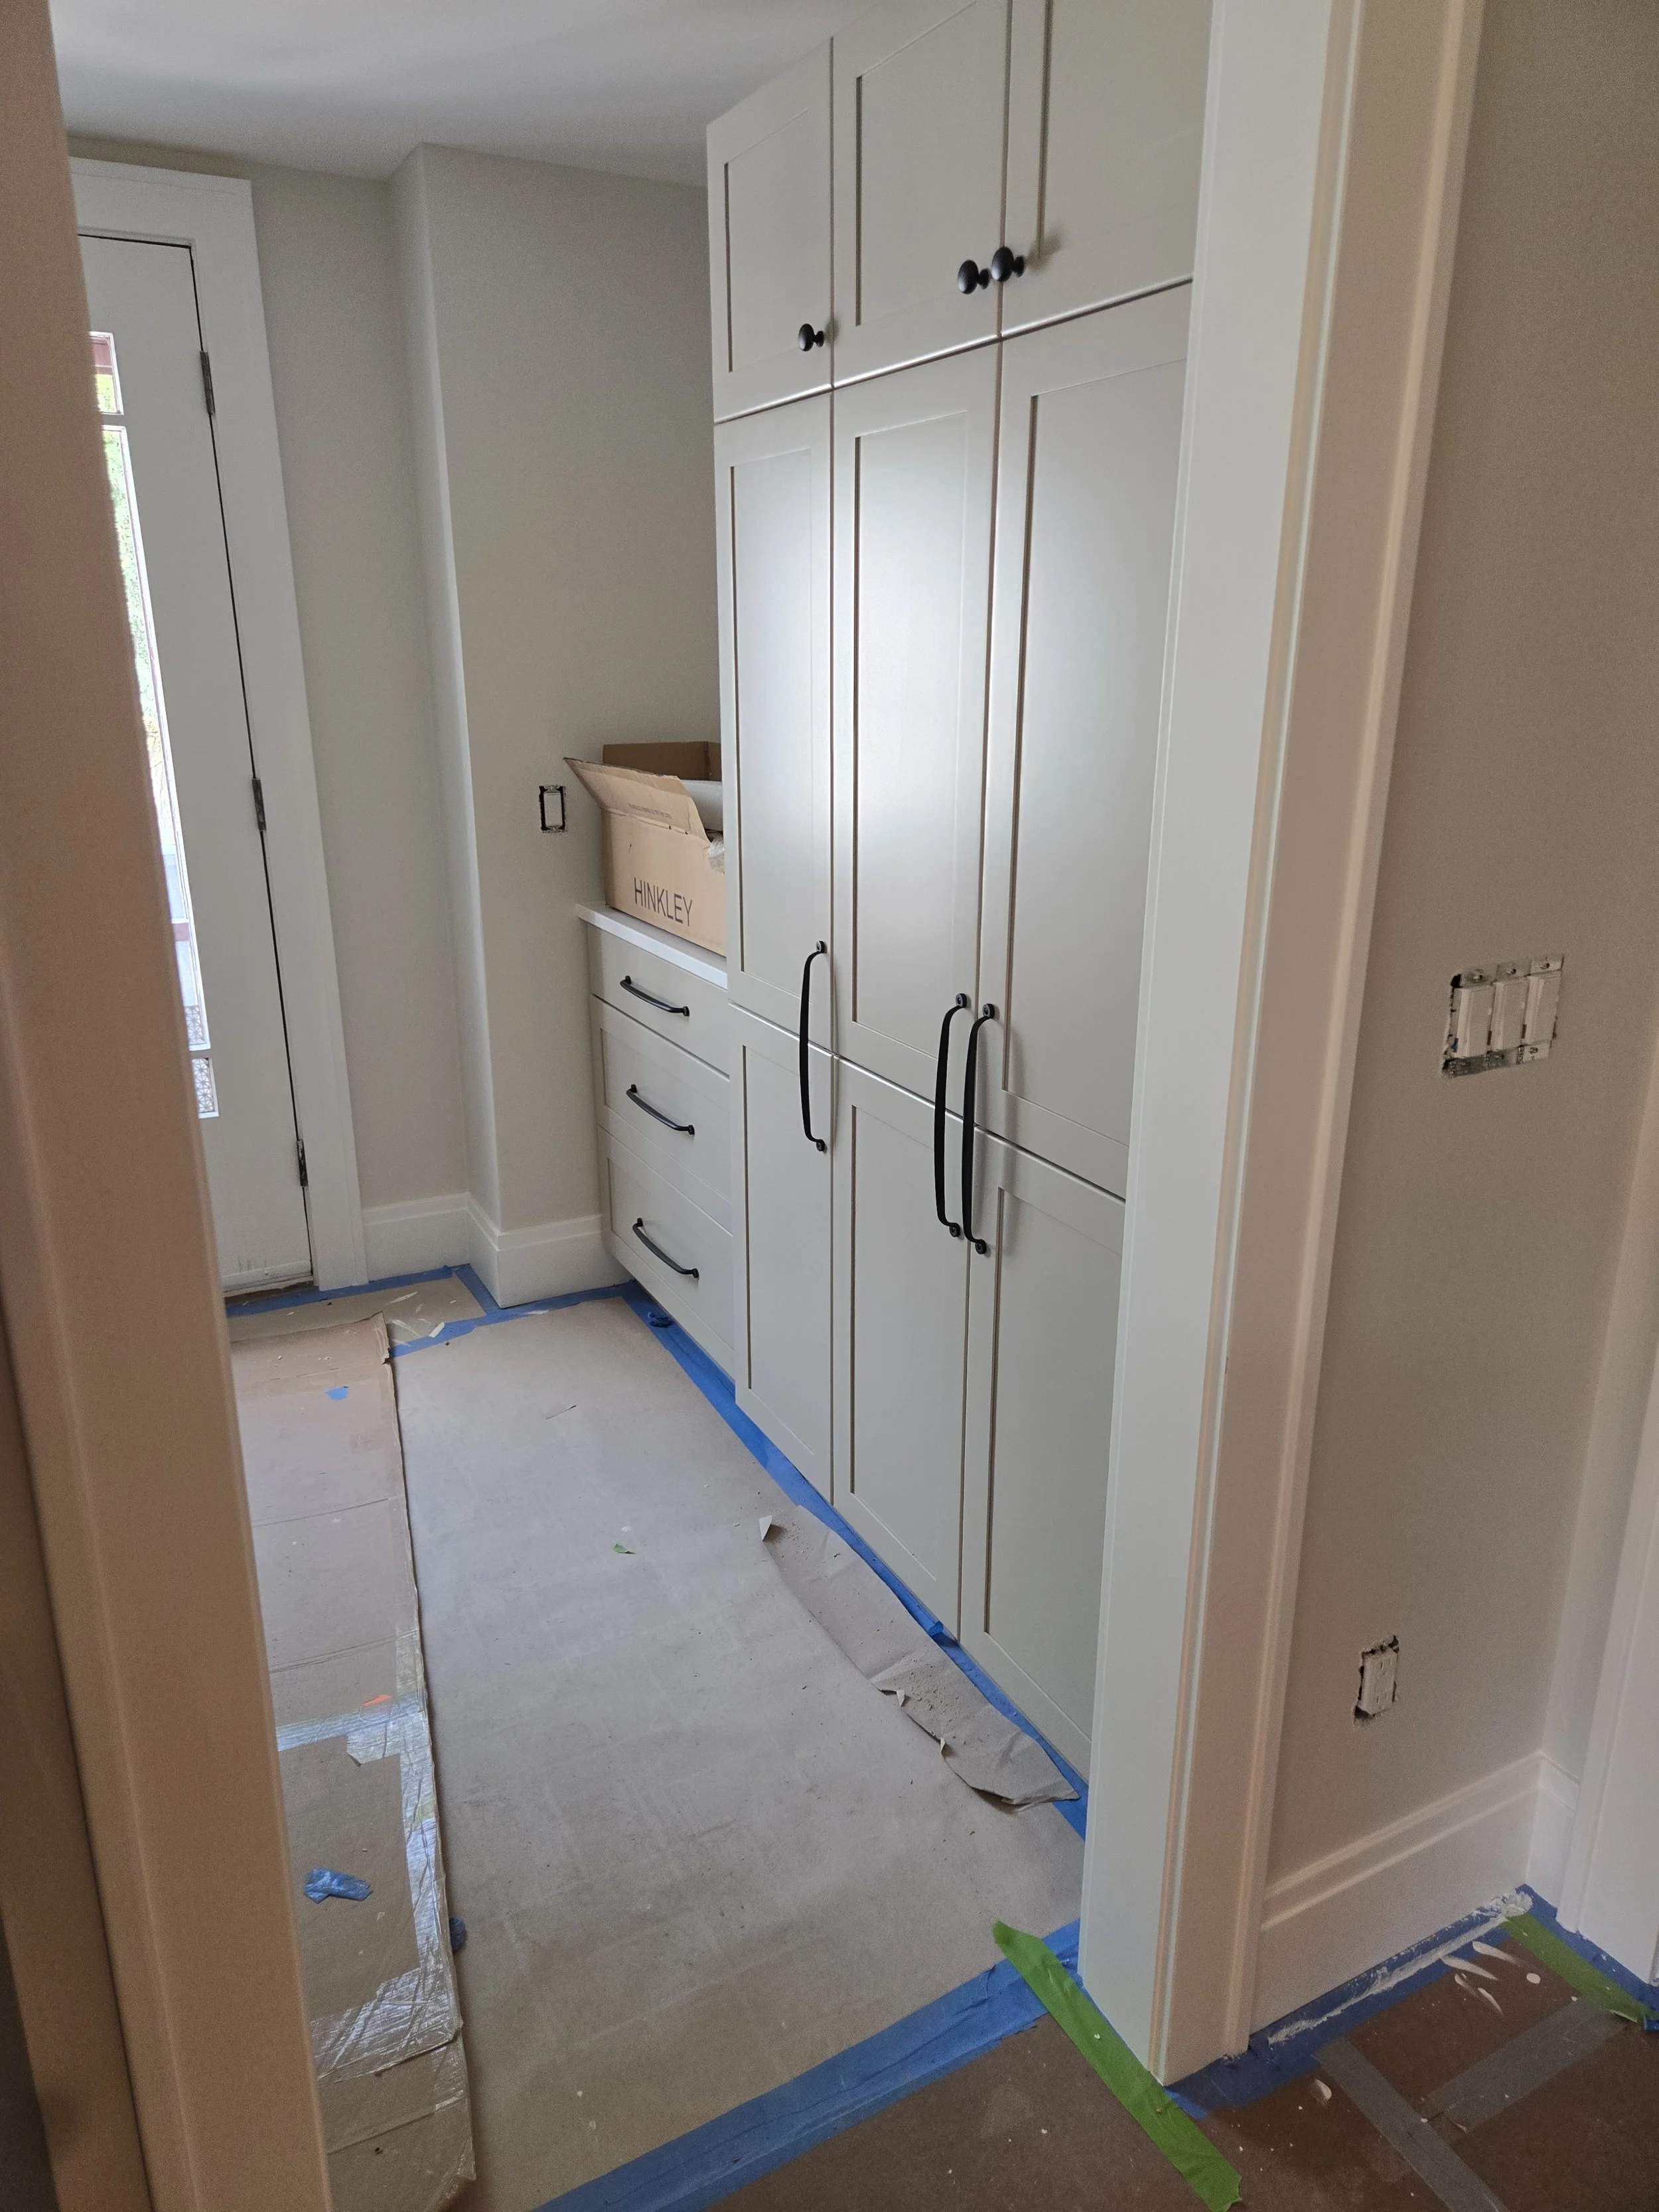
The arched wet bar cabinetry takes shape, with gray-blue glass-front uppers flanking the curved niche that will later be finished with patterned tile and floating wood shelving. And the crown molding frames a bank of white paneled drawers, with cabinet hardware now in place ahead of final walkthroughs.
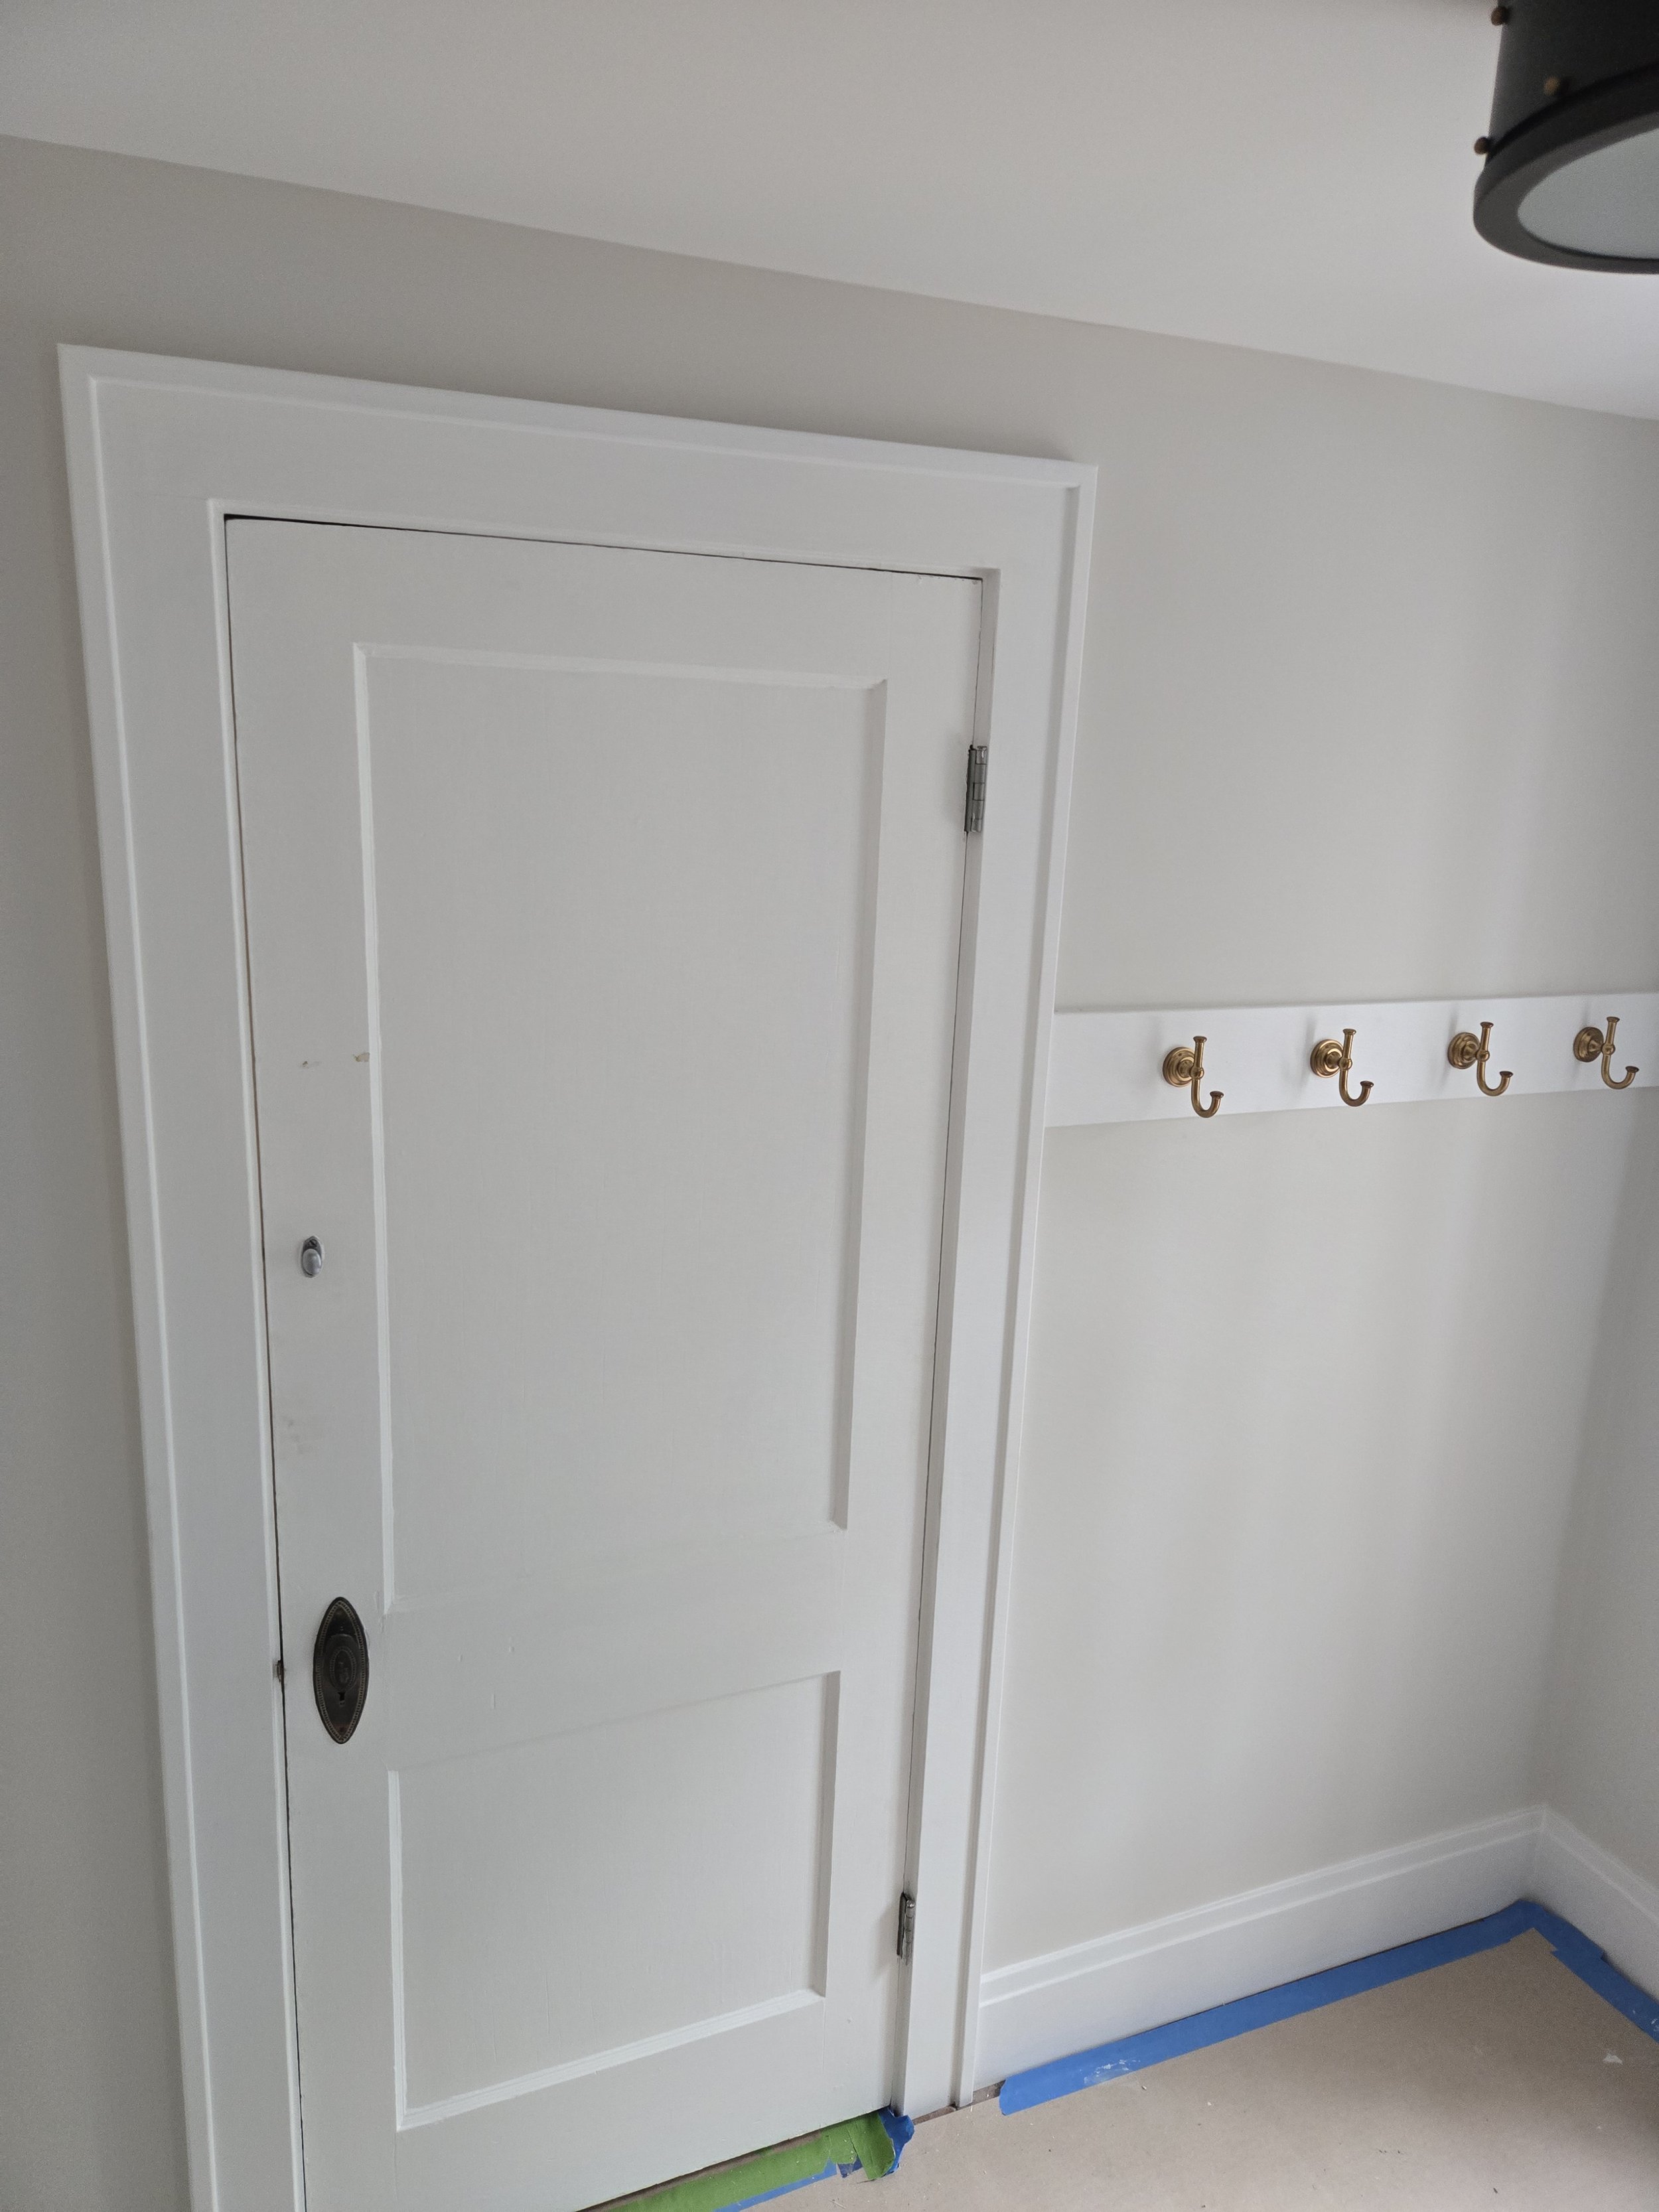
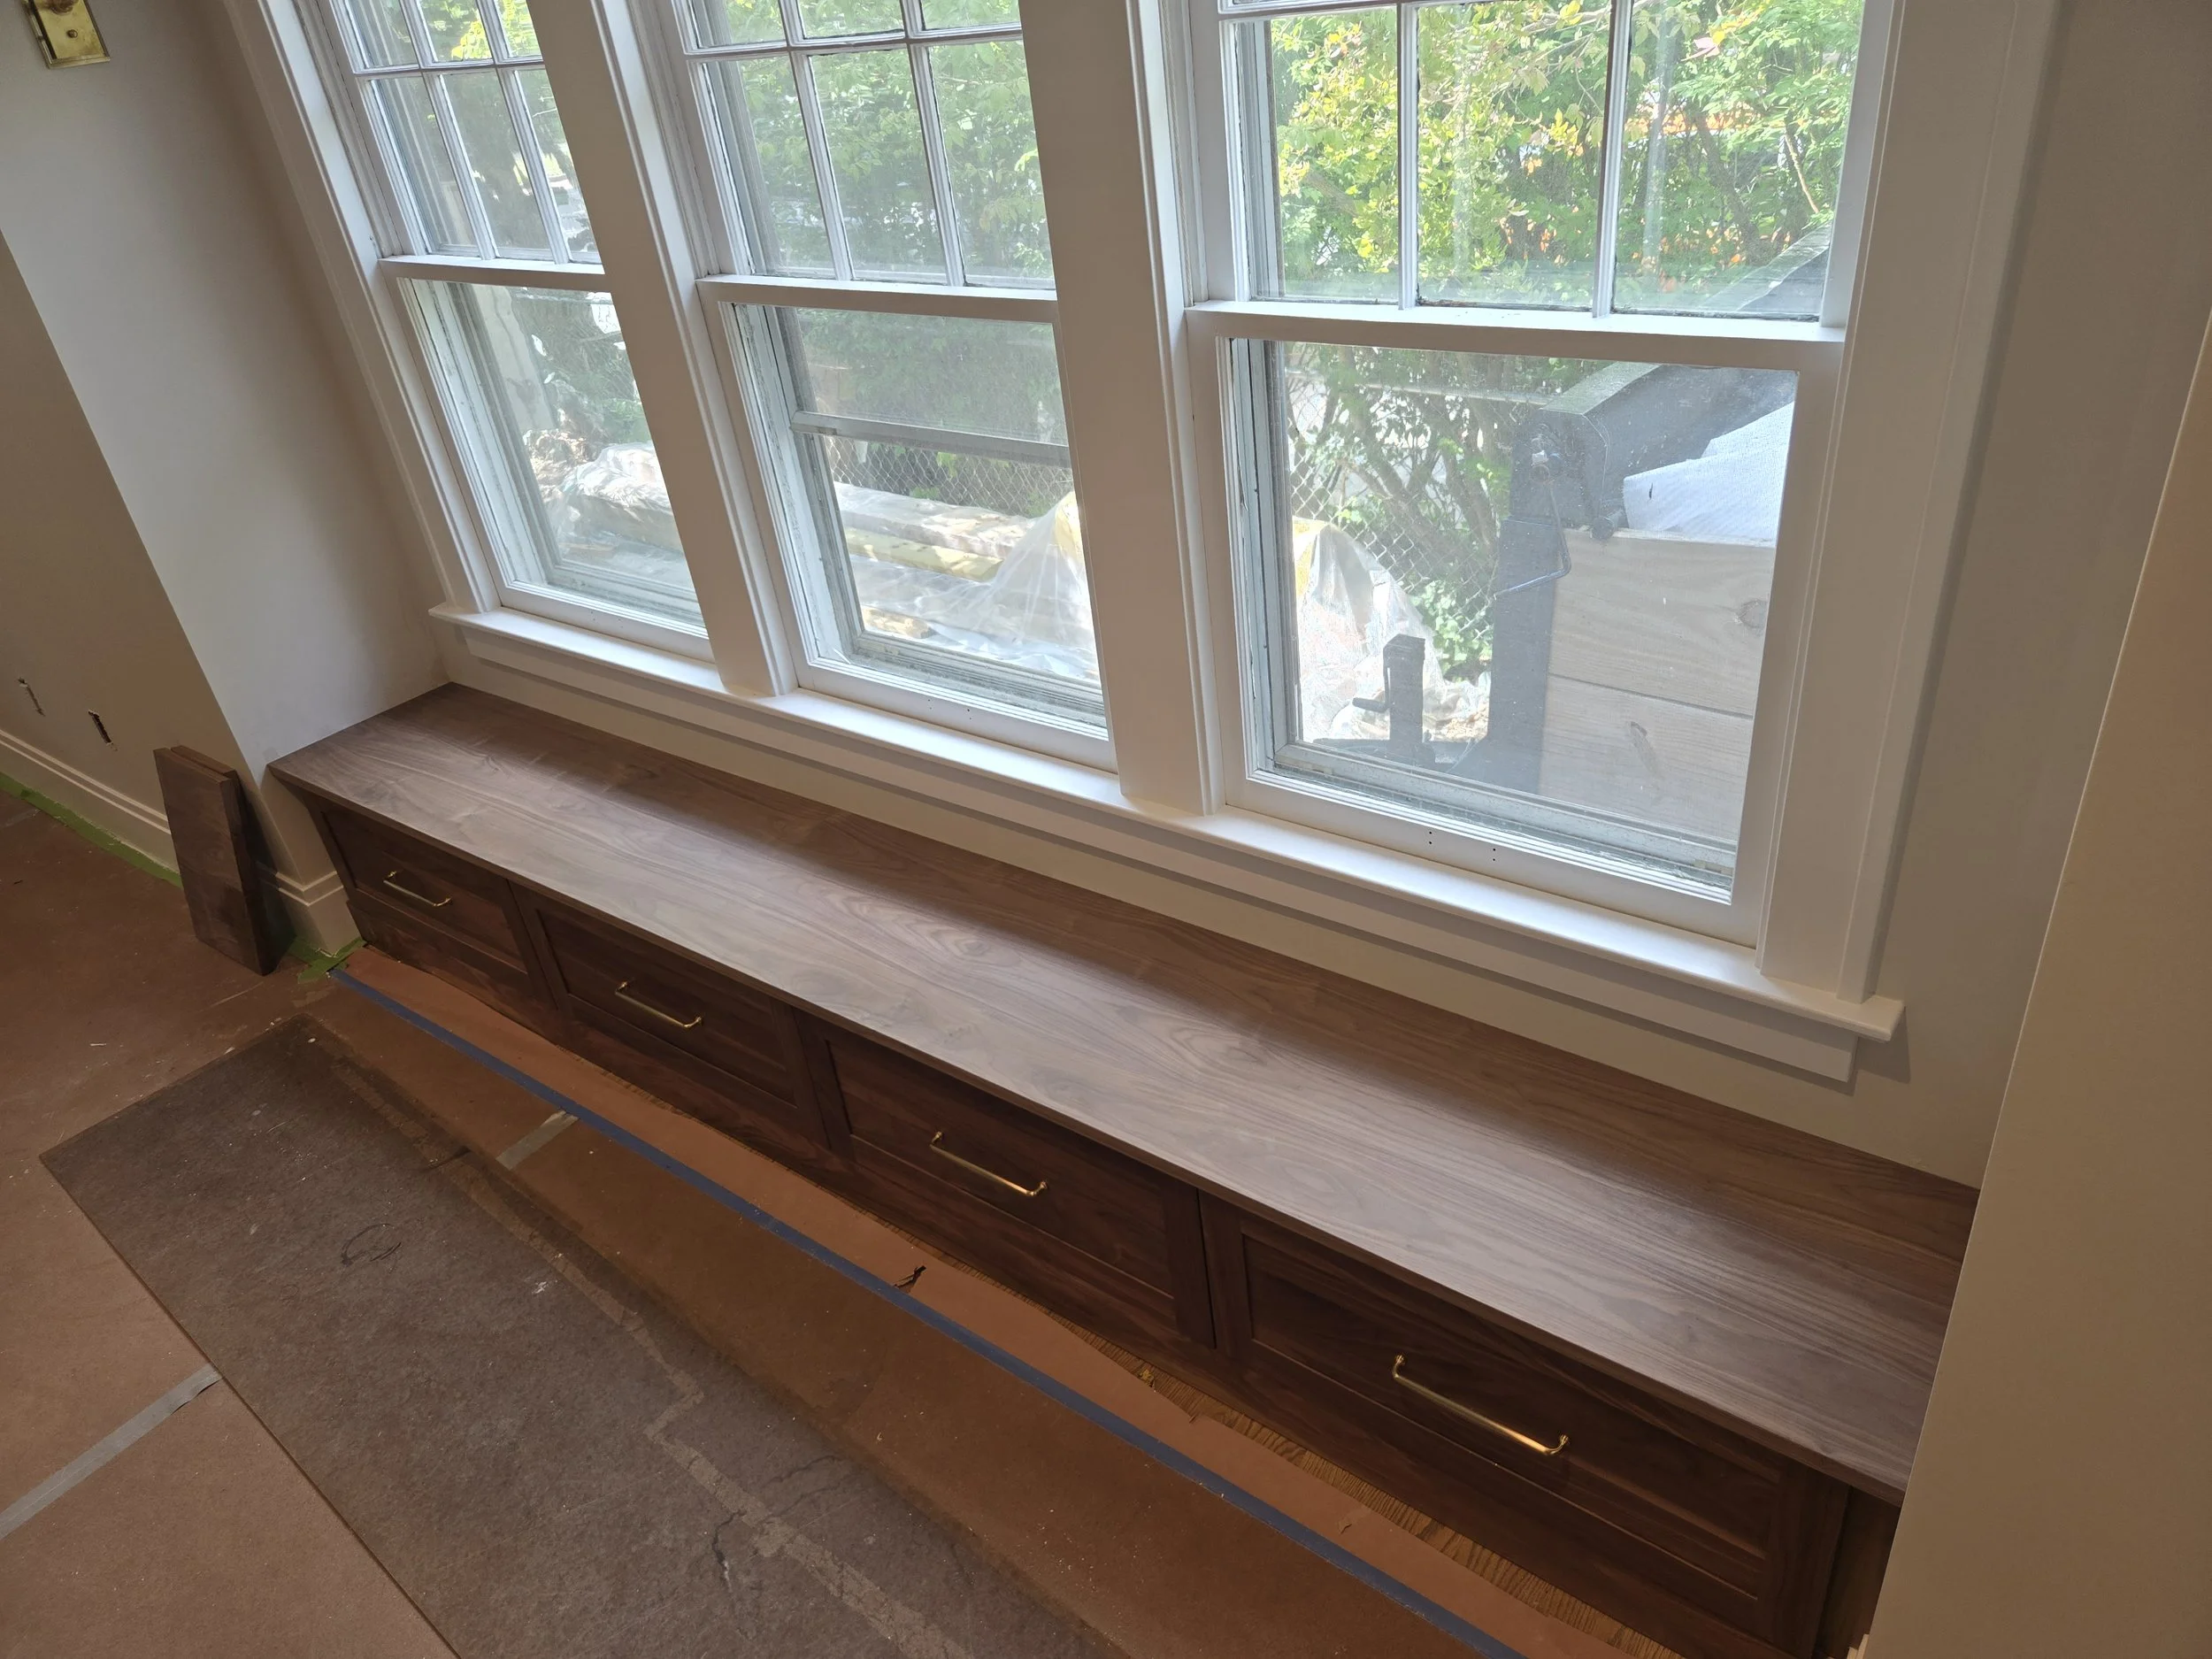
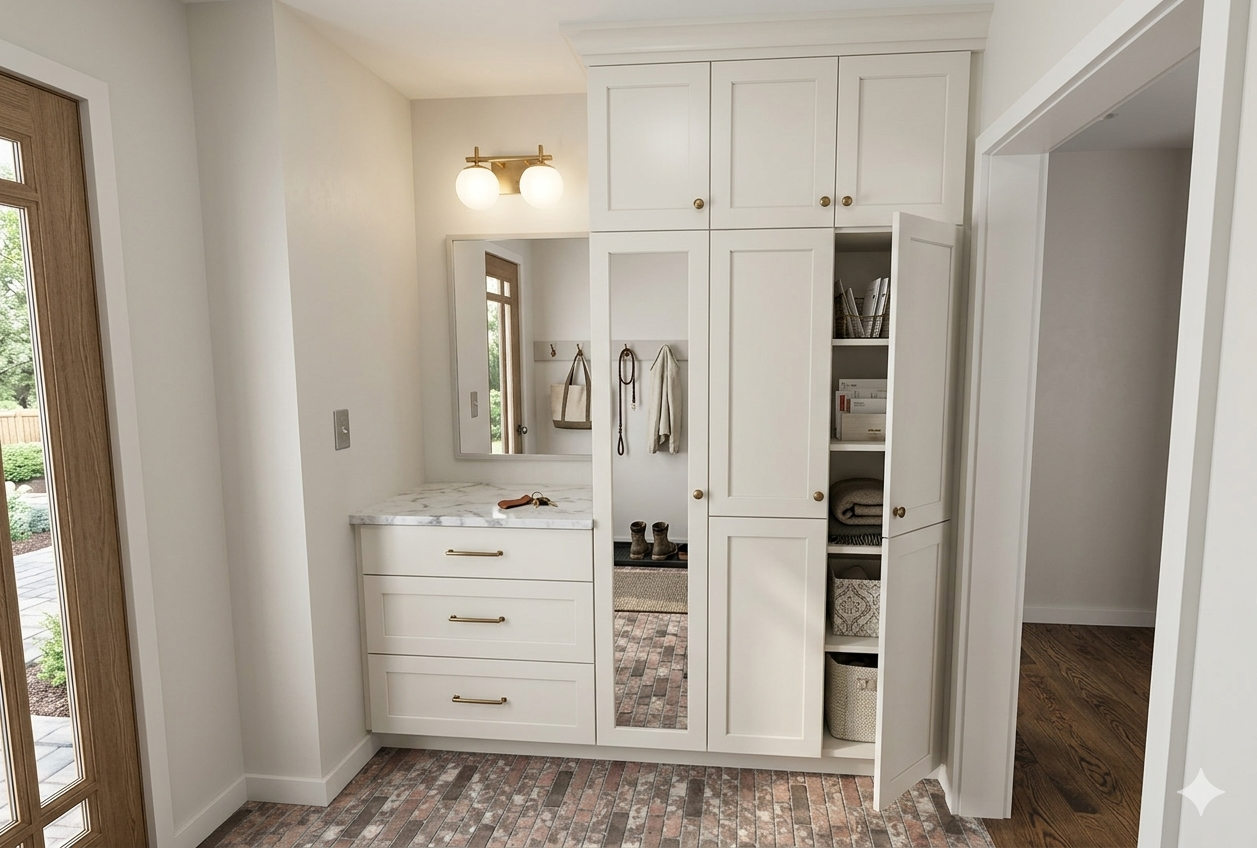
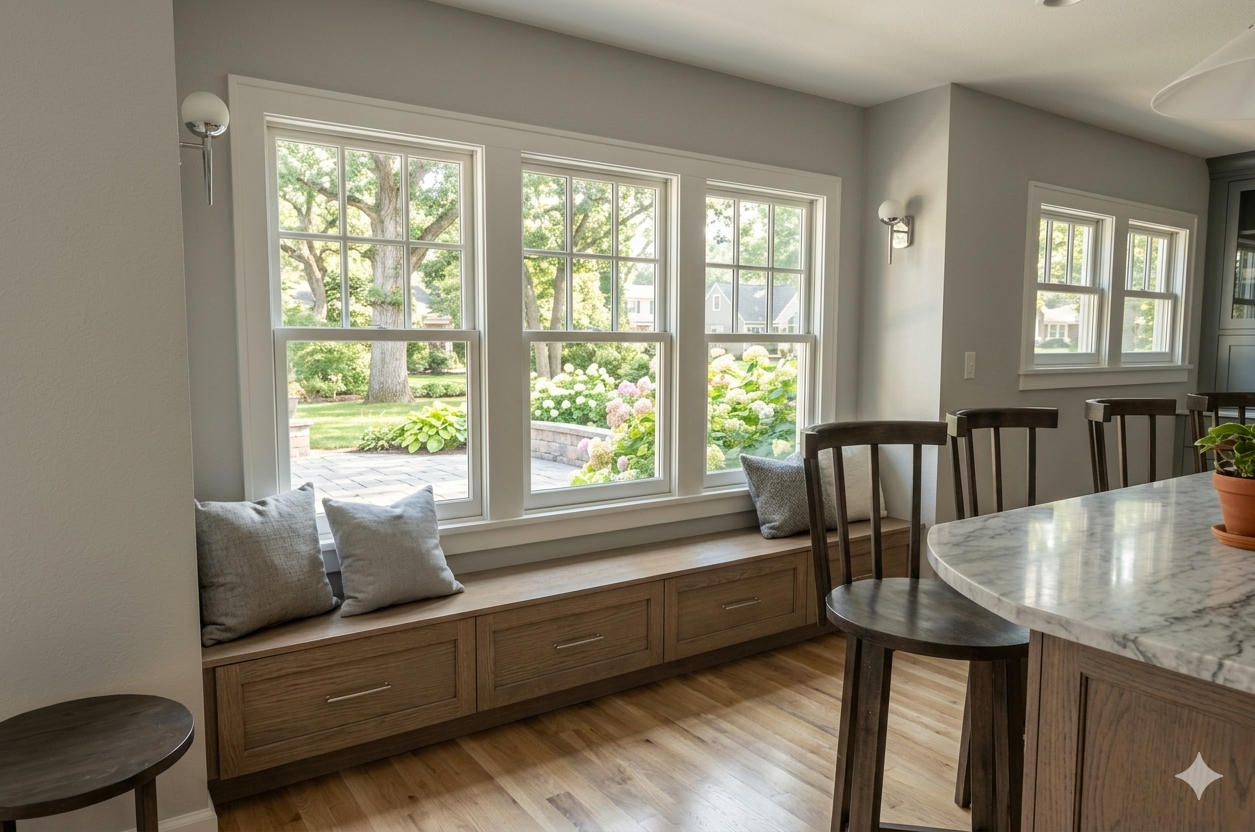
The row of brass hooks compliment the warm tile floor and the Built-in drawers are fitted beneath the triple window, bringing the custom window seat millwork from our early renderings to life.
Ready for Client Handoff
The final finishes are in, the floor protection has come up, and the first floor is officially ready to hand back to our homeowners. What was once a compartmentalized, dated layout is now a sophisticated, open-concept space built for gathering — from a moody, tiled primary bath to the show-stopping wet bar anchored by that gorgeous arch we teased back in our pre-construction renderings.
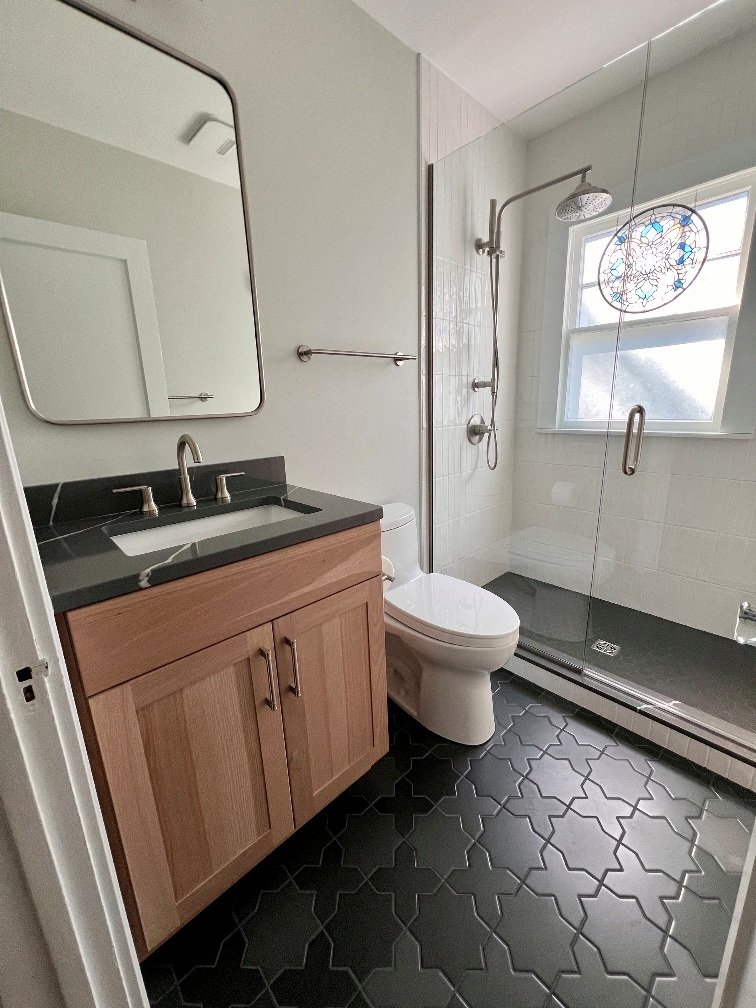
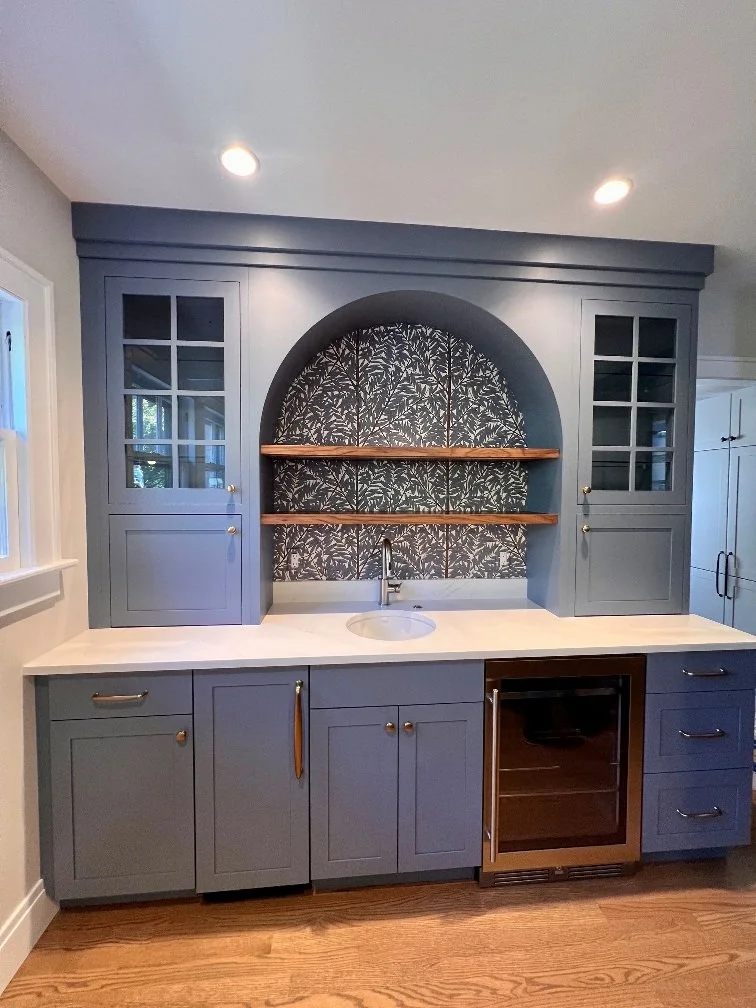
The completed bathroom pairs a white oak vanity with a honed black quartz countertop, black star-and-cross floor tile, and a glass-enclosed shower with a rain showerhead and a custom stained-glass accent window. The gorgeous wet bar, anchored by the arched niche first shown in our renderings, now features patterned tile, floating wood shelving, a marble-look counter, a farmhouse sink, and a built-in beverage fridge flanked by glass-front cabinetry.
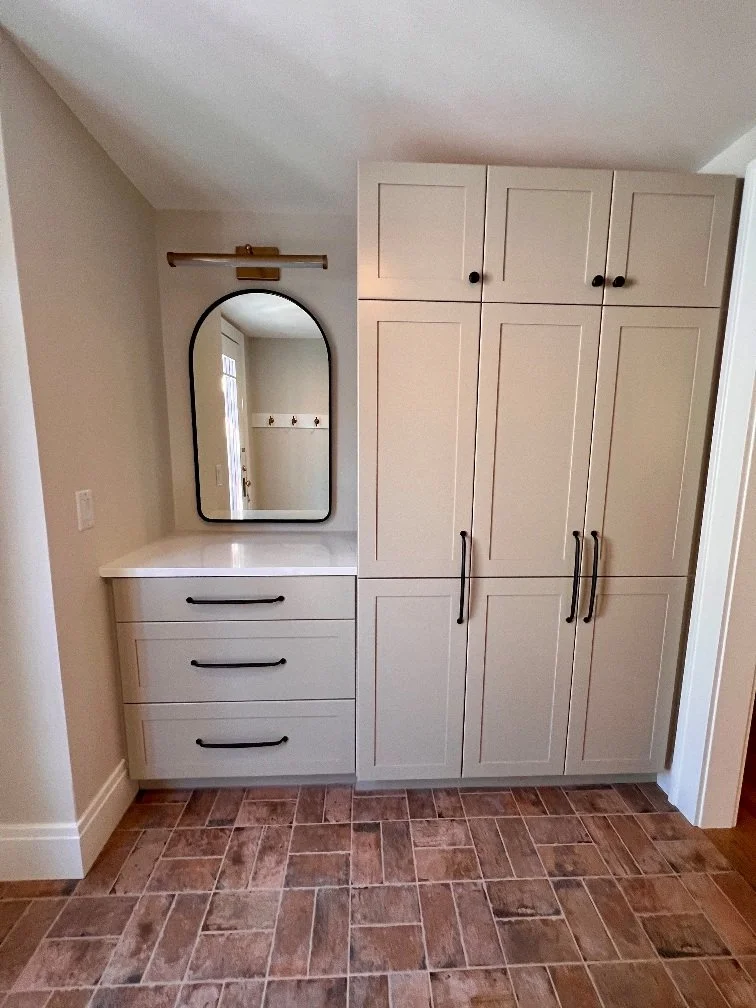
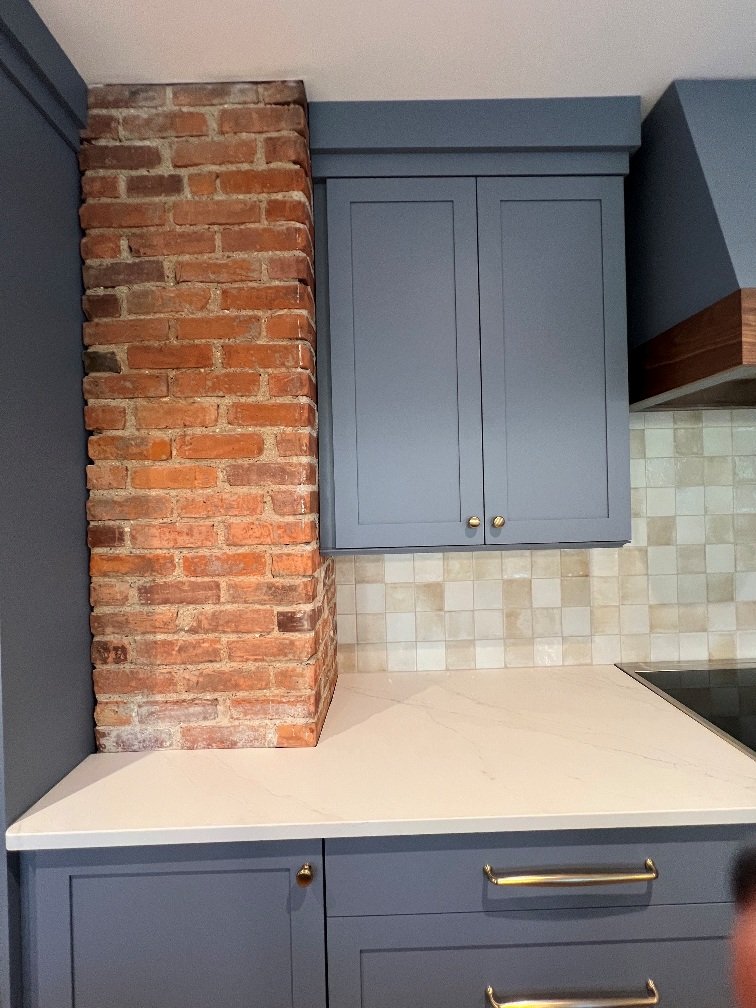
The mudroom's bespoke entry storage is complete, with floor-to-ceiling cabinetry, a built-in cabinet with drawers, an arched mirror, and warm brick-patterned tile underfoot. And in the kitchen, the exposed brick feature column stands in handsome contrast against the blue-gray upper cabinetry and glazed tile backsplash, preserving a piece of the home's original character.
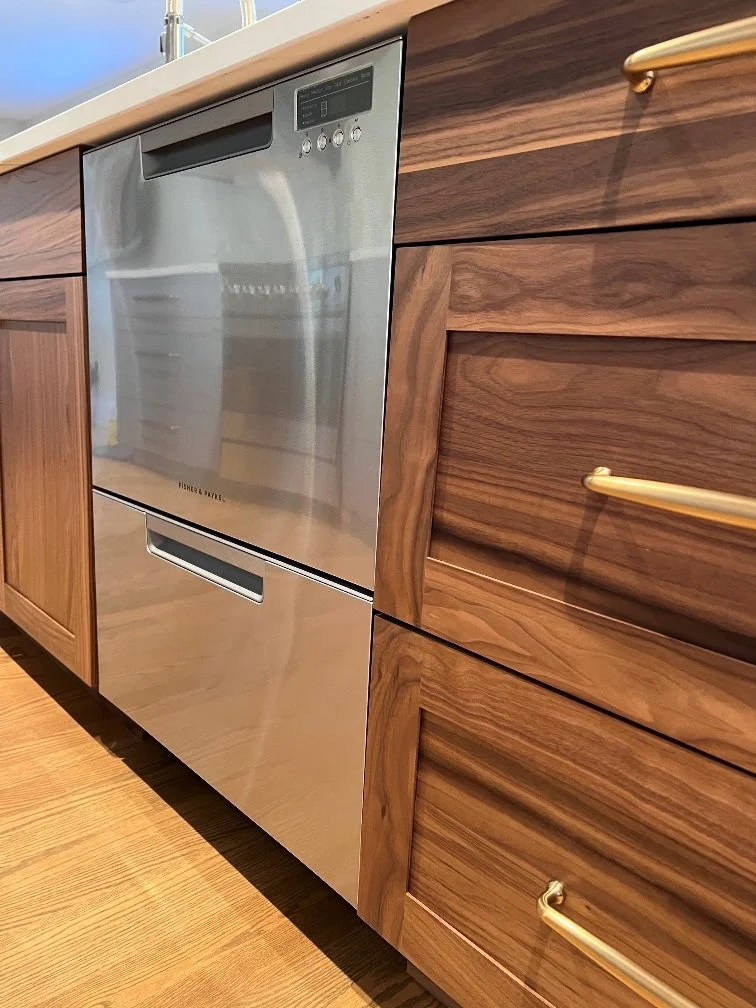
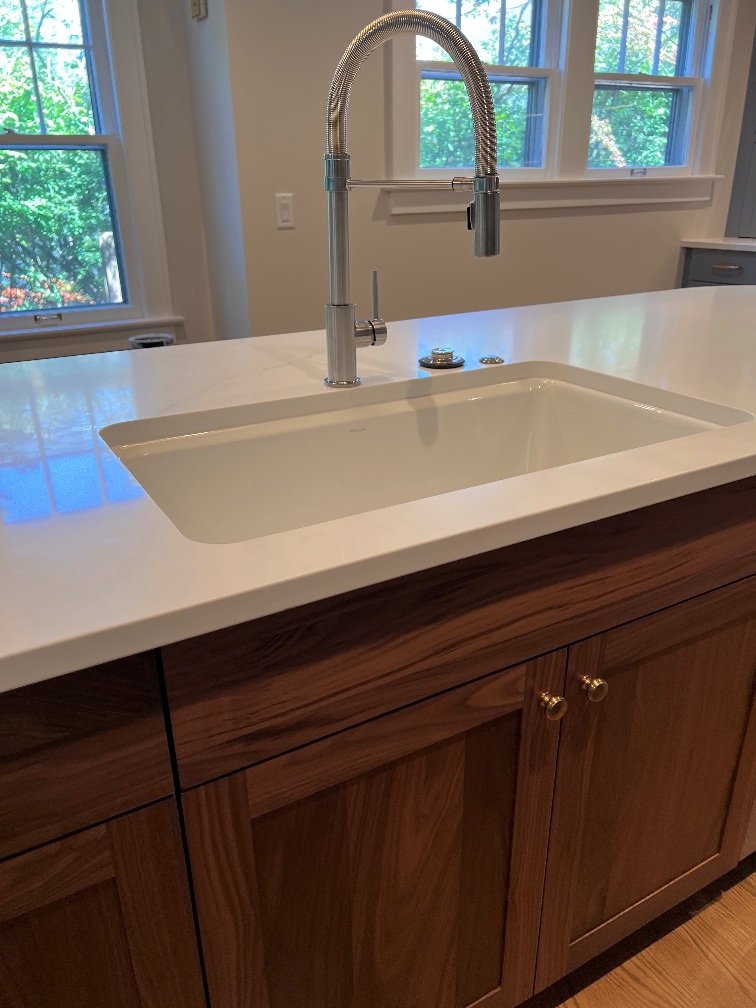
Stainless steel dishwasher drawers are seamlessly integrated into the rich walnut island cabinetry, finished with warm brass hardware. A farmhouse-style undermount sink and industrial pull-down faucet complete the kitchen island, set beneath a bright white quartz countertop.
Our project is complete, our clients elated 😊
Stay tuned for after photos.